As I mentioned originally, there were quite a number of problems with this bike when I bought it. So, here is the story of the repairs necessary to make the bike roadworthy and hopefully reliable. Apologies, but it’s quite a long tale.
Loose Silencer and Brake Switch
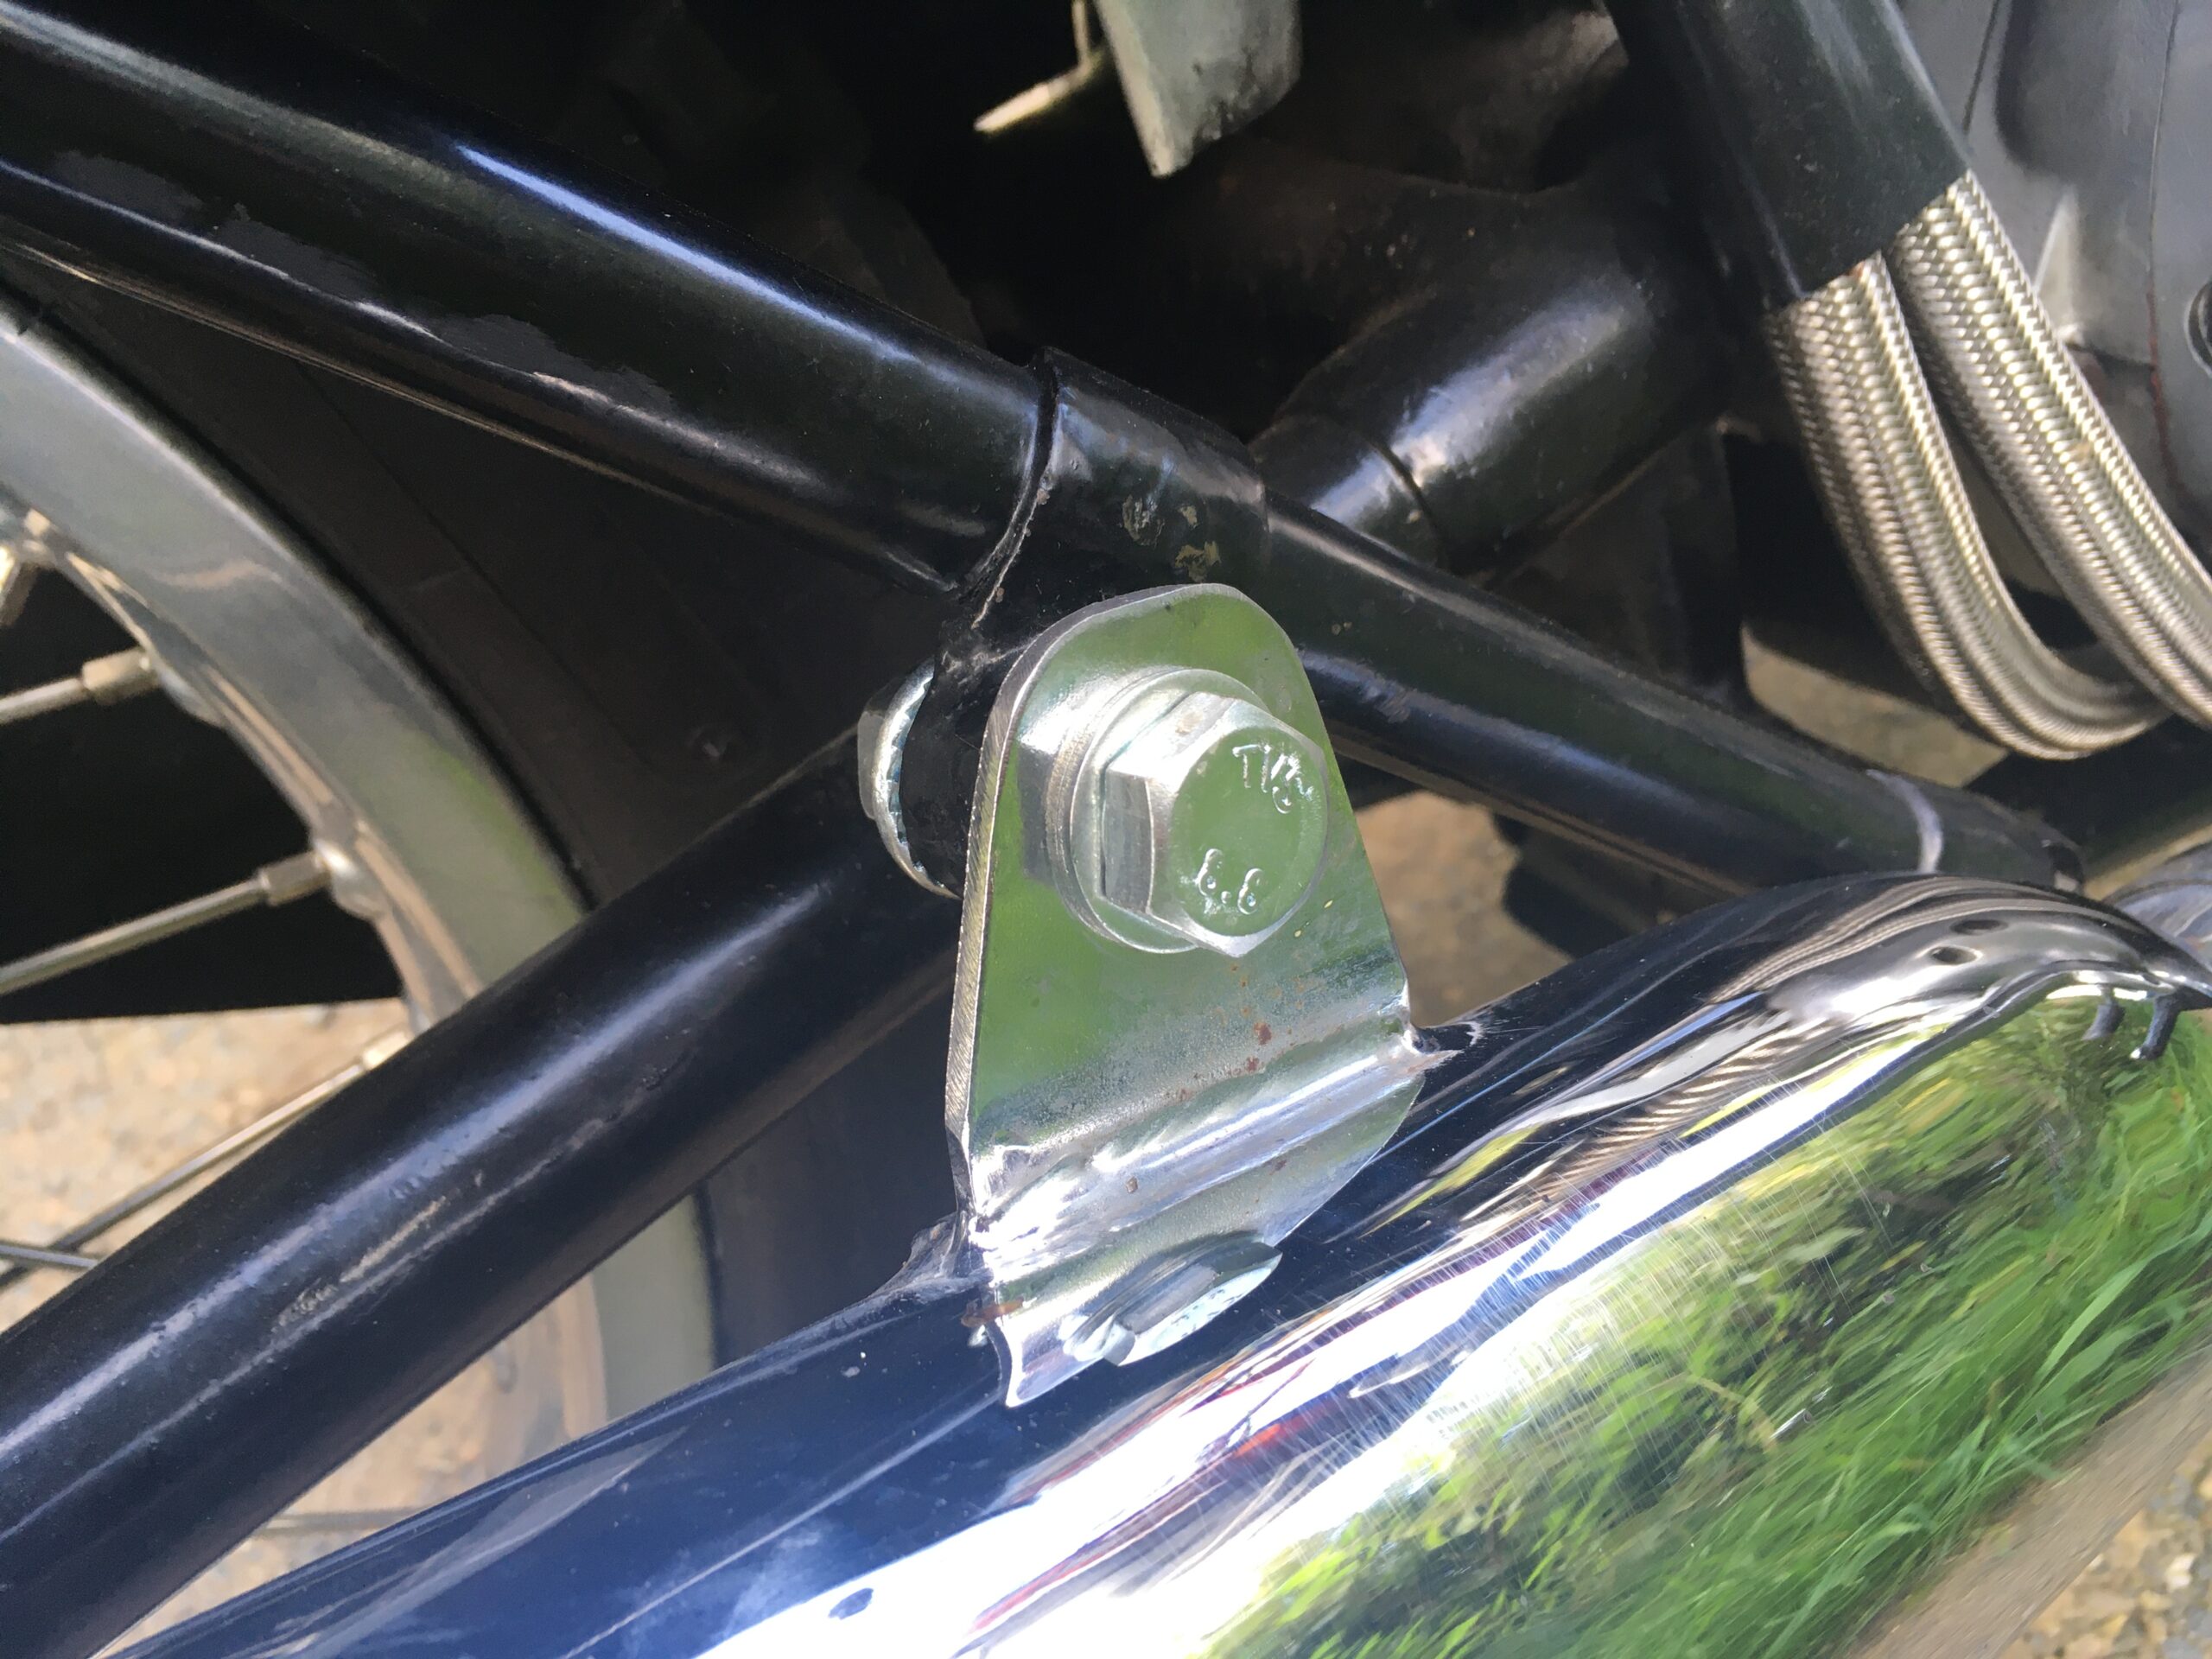
Silencer Bolt
Fairly easy ones these. For some unknown reason, the large bolt fixing the silencer to the frame was missing. This fixing point is designed to take a pillion footrest too, so the hole seems larger than necessary.
I used a bolt, washers and nut that I had on hand which would fit…at some point I’ll fit the correct AMC parts, but the solution works. Fortunately, the silencer hadn’t fallen off on the way home…although I suspect I would have noticed if it had.
I don’t have an image of the brake switch, but it is a standard type that has a spring with a round clip at one end, to fasten on the brake rod. Mine had simply slid up the brake rod and was easily adjusted.
Horn not working
It’s nice to have a good horn on your bike…especially when you need to alert car drivers that you are not wearing a cloak of invisibility. They are handy to scare birds off the road too…and for cyclists, you know, those people that do no wrong and own the road, just making rude hand gestures if you ‘beep’ to let them know you’re coming past.
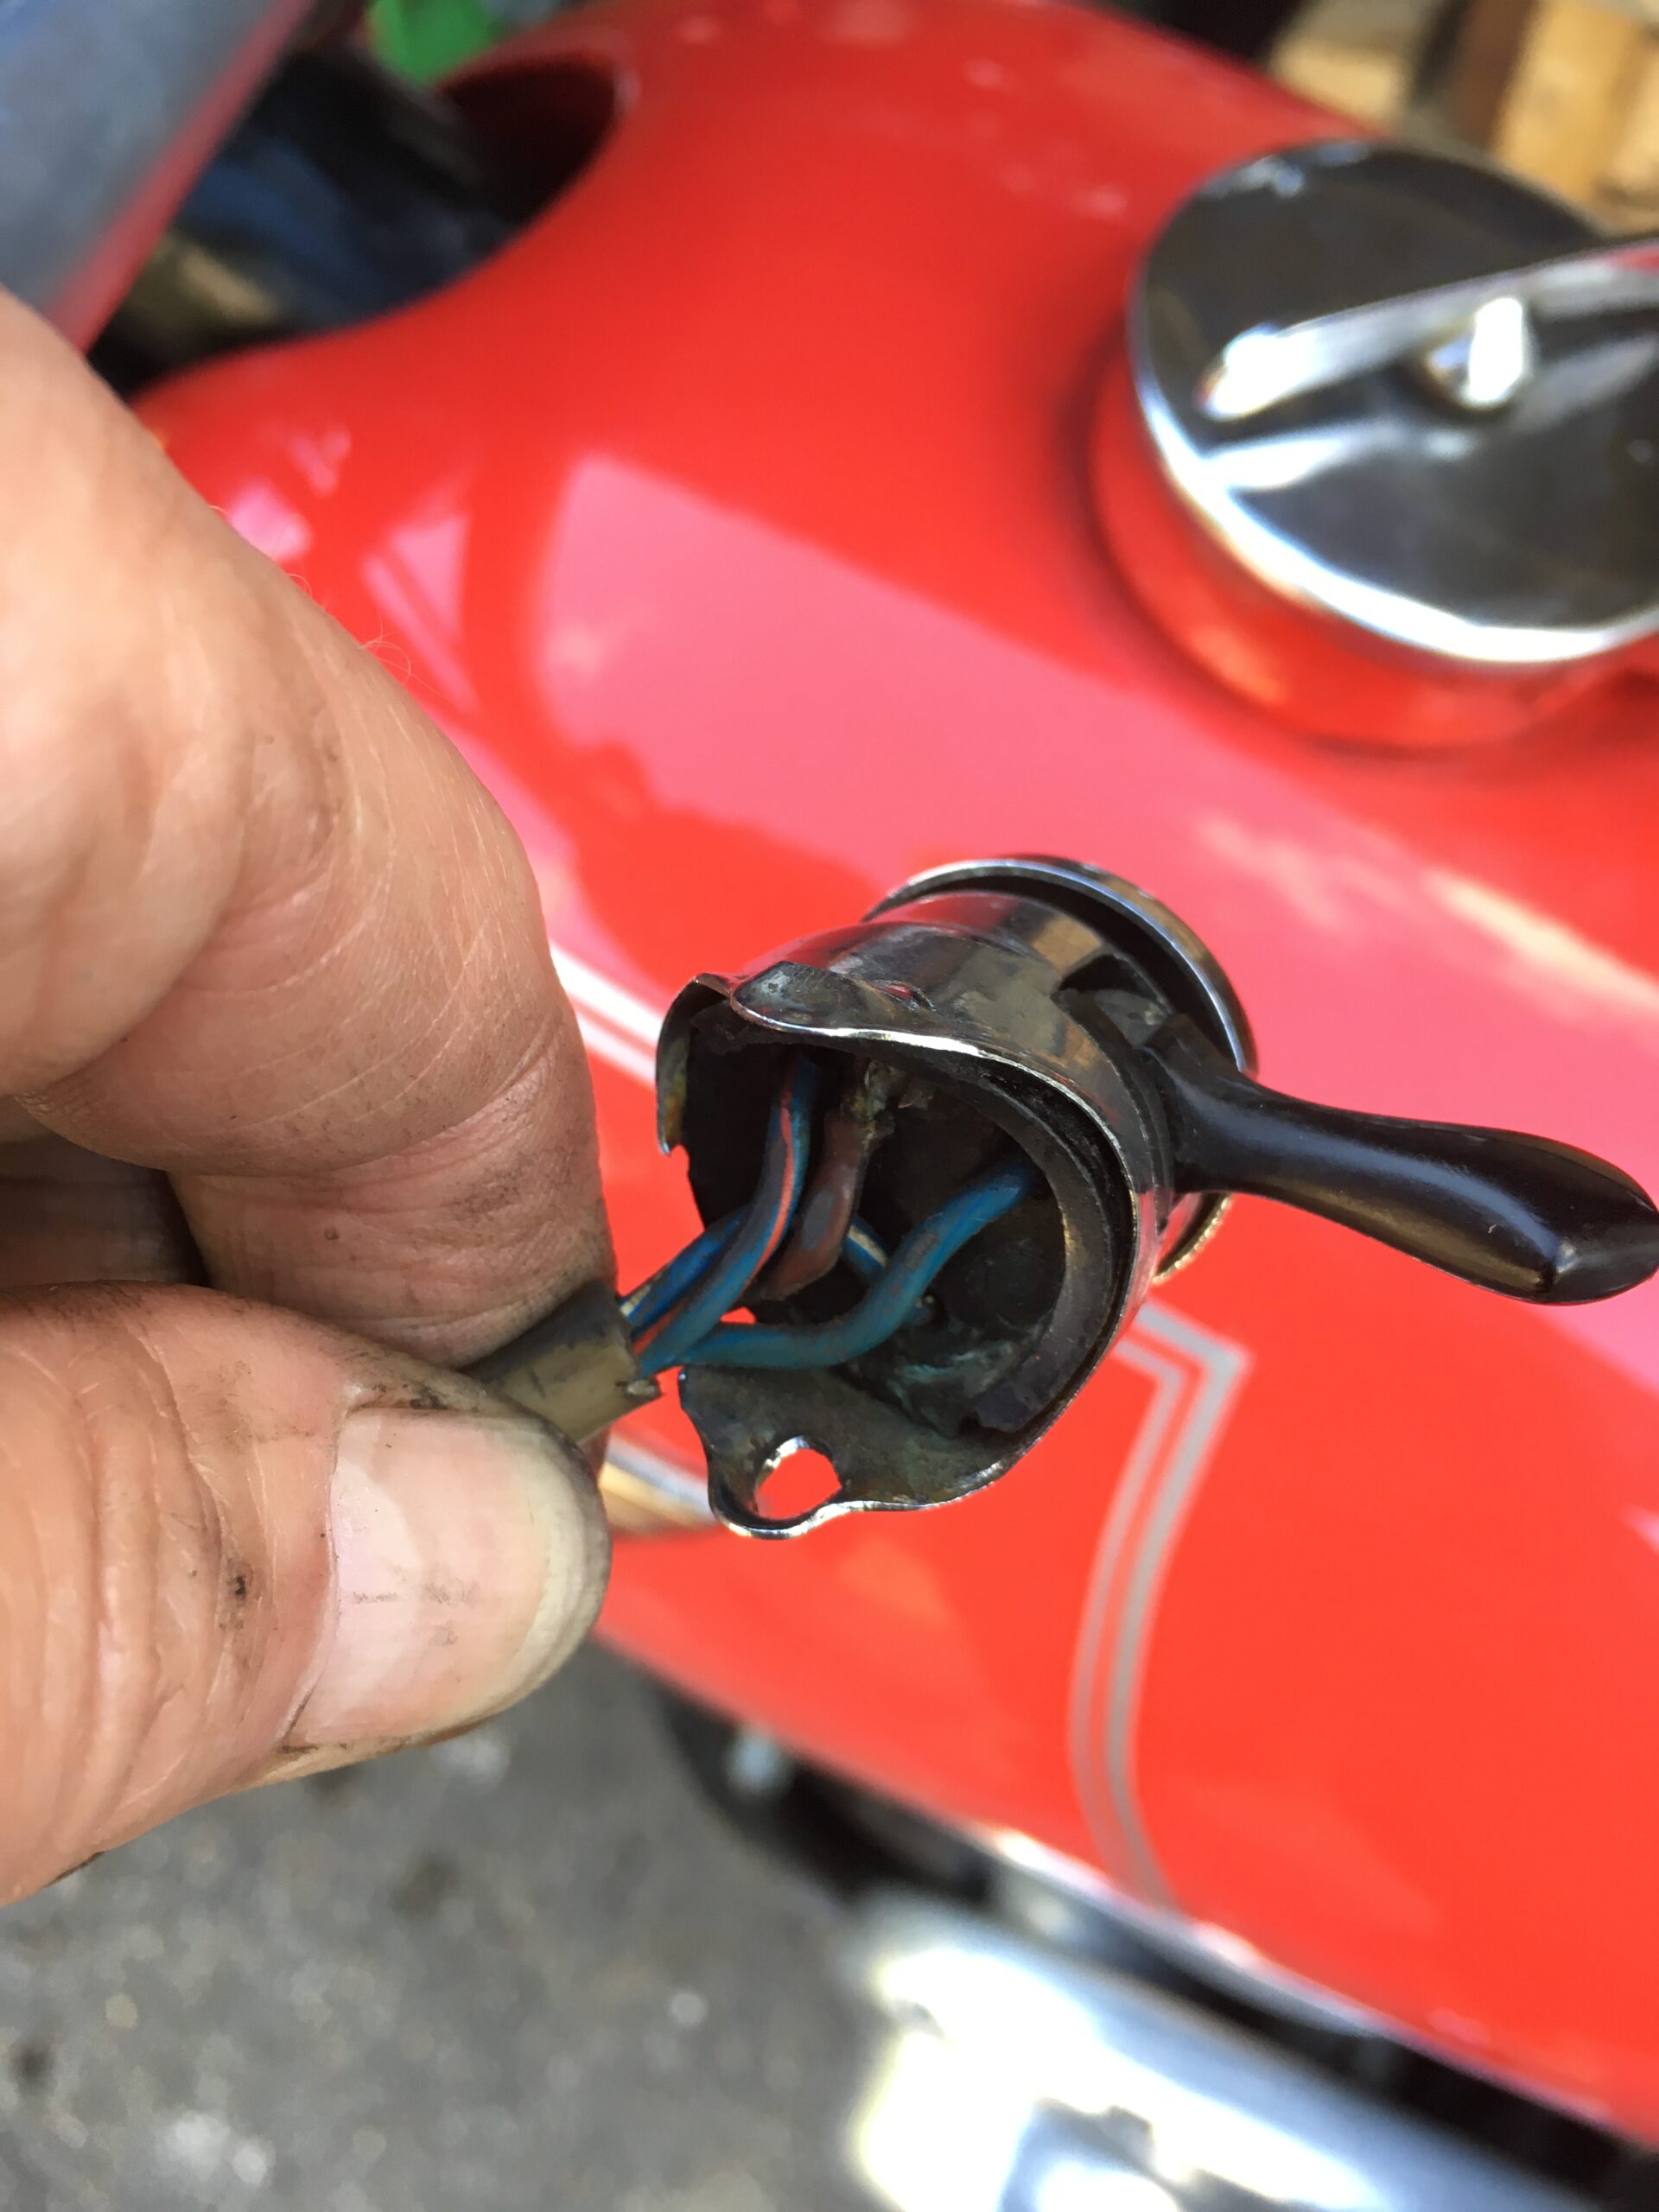
Beepless horn button
Anyway, the horn didn’t work. I checked the rather terrible wiring back to the horn itself, only to realise that the horn button wasn’t grounding the horn.
It turns out that the seller had at some point lost the metal clip that secures the horn and dip switch assembly, onto the handlebars.
He had replaced it with a plastic tie wrap, which is a fantastic insulator, as are the innards of the switch…hence no horn. I didn’t have a replacement clip, so have used a spring for now.
I’m guessing most people lose the clips at some point, because none seem to be available anywhere.
Oil – or rather total lack thereof
Like most classic bike owners, I check the engine oil in the tank before starting and immediately afterwards; initially to make sure there is enough in and then to ensure there is oil returning from the pump. There was enough in the tank and I assumed the seller had kept the other fluids topped up. When I got home I found there were only a couple of tablespoons of oil in the primary chaincase and no visible oil in the gearbox!
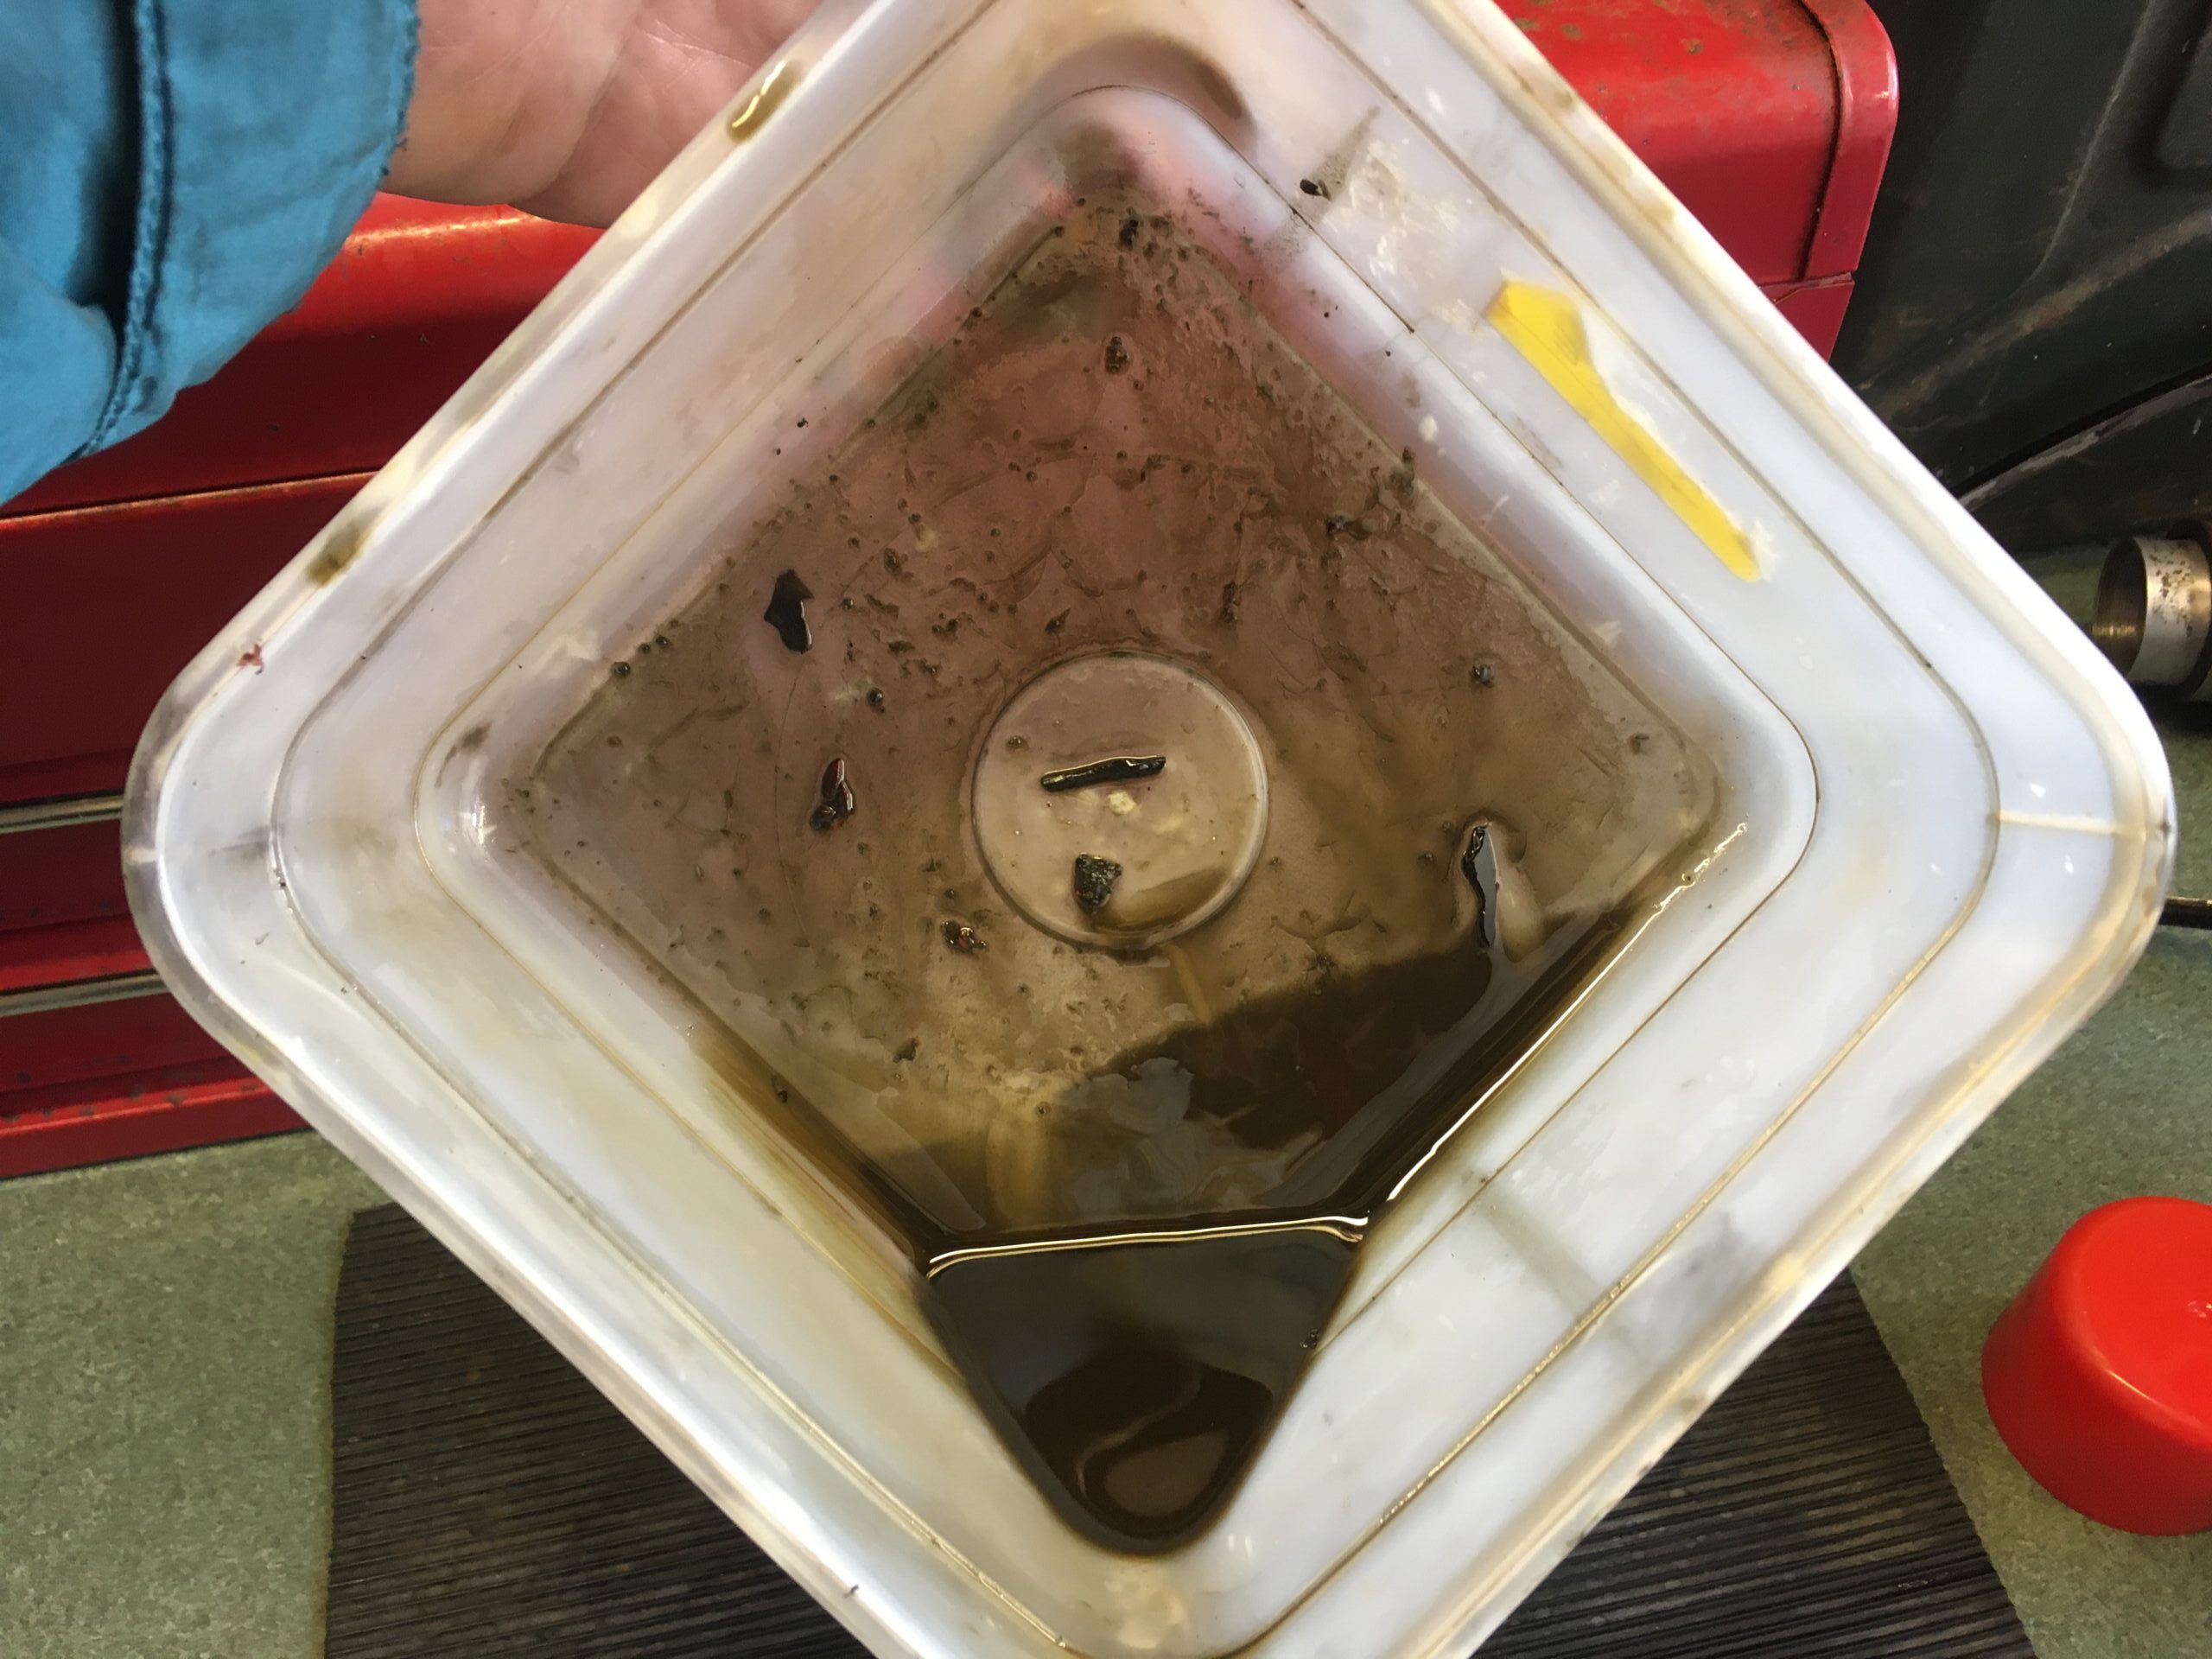
All the oil from the primary chaincase
I had some work to do on the primary chaincase (see below) and once the gearbox was topped up with the full pint of oil, it did leak a little. The outer cover will be removed, all the seals replaced and refitted using a new gasket. I’m guessing both reservoirs had leaked until they were dry, and the seller hadn’t checked the levels. If the rubber seals have been on for some years, they will need replacing.
When you fill the primary chaincase with oil, it should just touch the bottom of the primary chain; see below.
Side Stand
The seller had brazed a long side stand to the rear section of the frame. It was a useful addition to a point, but I was concerned about how safe it was. On my way home after buying the bike, I called in at Bishops Garage in Corbridge to fill up with fuel. After filling up, I sat astride the bike to prepare to start it and the side stand detached from the frame completely…and the bike fell sideways.
Weak Brazing
I started to lift the bike and another motorcyclist kindly assisted as I was caught against the pump.
Inspection of the brazed joint suggested that the original braze hadn’t been as strong as it could have been.
I’m quite happy with the factory side stand so won’t be refitting the long stand…apprentices love being sent to get a ‘long stand’ from stores 😉
The long stand may well be of use on my trials bike project, using an Andy Bamford frame. It has a lug on the frame which looks ideal for this stand.
Time will tell.
Speedometer ‘Sticking’
The speedometer wasn’t actually sticking per se, but whilst riding, it would regularly drop to zero, then flick past the current speed before settling down again. This is normally indicative of a speedometer cable either kinked or in need of lubrication. I removed the cable, extracted the inner core and lubricated it. It looked dry but turned freely so I suspected something else.
Losing a nipple is never good
When I examined the speedo drive on the rear wheel, I found that the grease nipple was missing, and had been for a while; the hole was full of detritus! I cleaned the hole out and injected some grease through a new grease nipple.
I’m not 100% happy with that now, so when I remove the wheels to fit new tyres and tubes, I’ll dismantle and clean the speedo drive; hopefully that will be enough and a new speedo drive won’t be needed.
Surging whilst bimbling along
Bimbling is a lovely old word, which the WordPress Dictionary seems oblivious to. It means ‘travelling at a leisurely pace’. I found that the bike performed well, but whilst bimbling along at around 30mph with almost no throttle, the bike was surging. Quite an uncomfortable situation if you’re riding the bike, only relieved by pulling the clutch in and letting the engine idle.
Mucky…with bits in the bottom too
It’s normally caused by either a partially blocked pilot jet, or said pilot jet being undersized. I removed the carburettor and noted the turns needed on the idle screw (3 1/2 turns) and mixture screw (1 1/2 turns) before they nipped up when screwed in; it means you can easily reset them to how they were before dismantling.
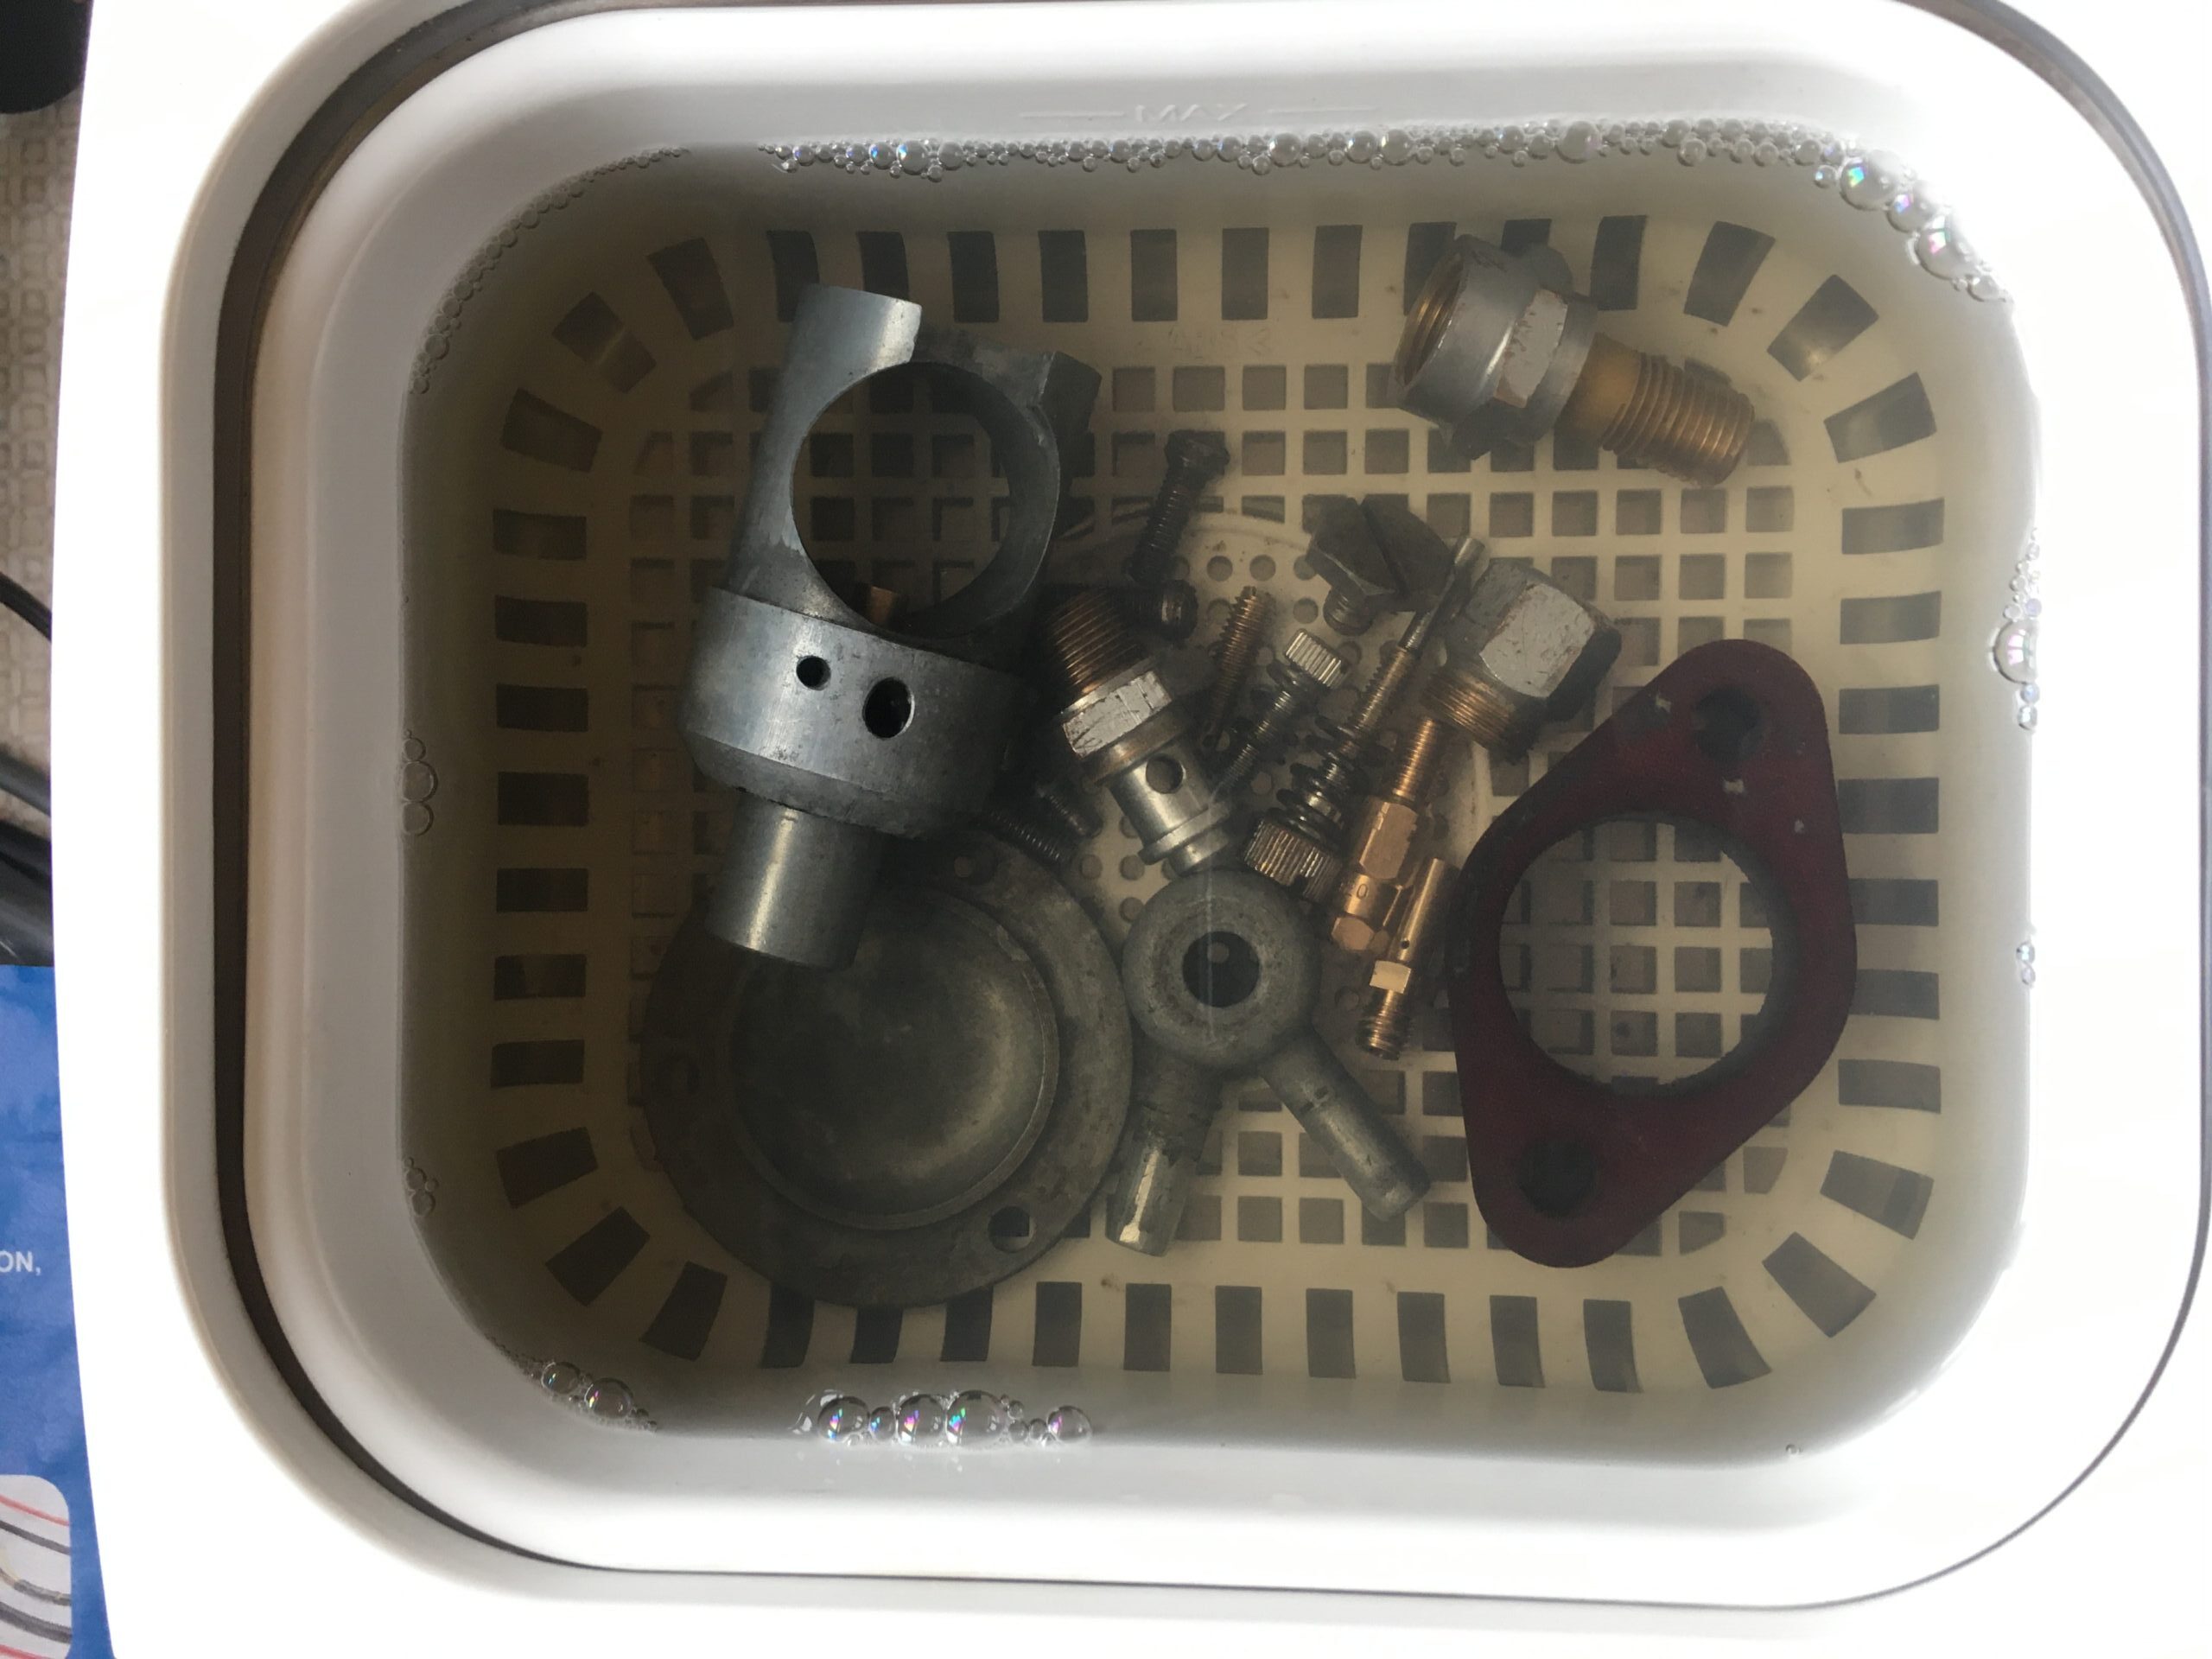
I dismantled the carburettor completely, cleaning all the components using pipe cleaners, brushes, thin copper wire and my ultrasonic cleaner. The muck that came out was quite nasty.
All the gaskets, o-ring and banjo filter were replaced. The jets were double checked and blown through with a tin of ‘Air Duster’. The white deposit sometimes left on after cleaning was burnished off and everything cleaned again dry.
At this point I discovered that the carburettor was the wrong one for the bike and the jet sizes were not all correct. I did however reassemble the carburettor and try the bike…the surging seemed a little improved, but wasn’t right. The seller had owned this bike for over twenty years, so I can’t understand how he put up with this.
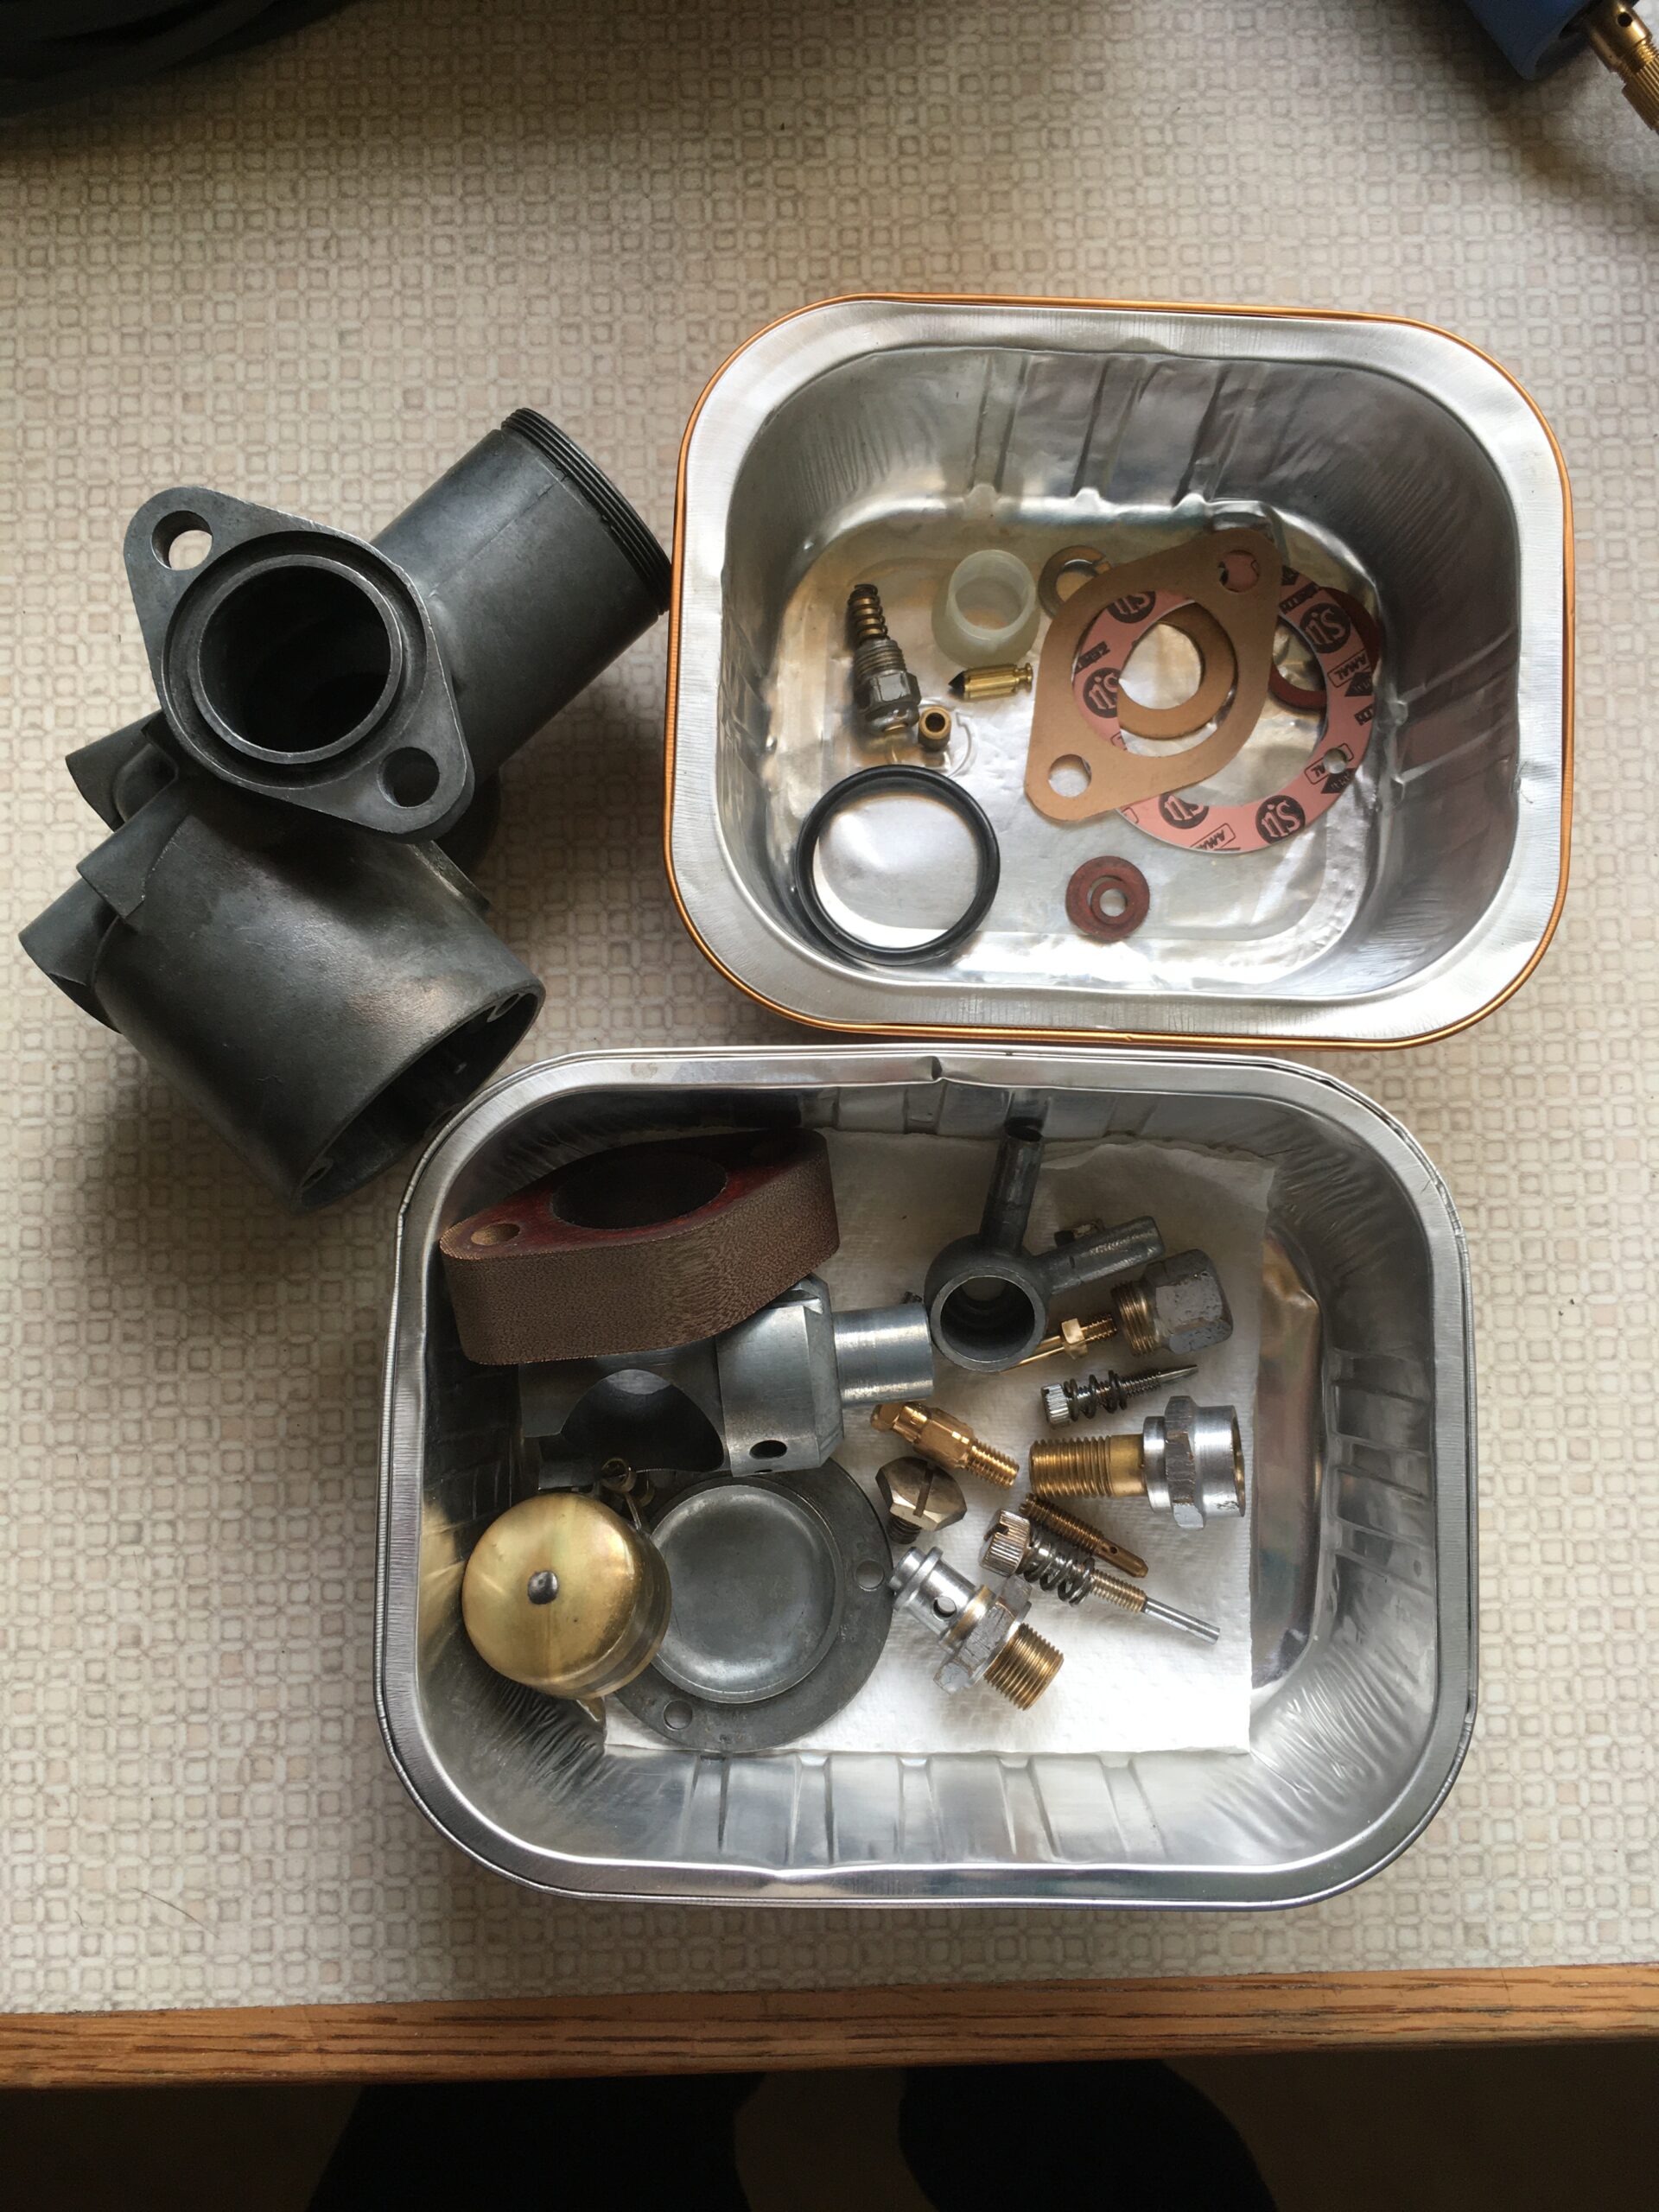
Cleaned and ready to reassemble
The carburettor is supposed to be an Amal Monobloc type 389/12 with a 1 3/16″ bore, 440 main jet, 30 pilot jet, 106 needle jet and needle position 3; according to Amal and Matchless specifications.
The one that is actually fitted, is a 389/27 with just a 1 1/8″ bore, 420 main jet, 25 pilot jet, 106 needle jet and needle position 3.
That extra 1/16″ of bore may not be much, but Matchless (AMC in actual fact) will have set that size for a reason…best performance.
For now, I’m leaving it in place, but have replaced the 25 pilot jet with a size 30. Once I solve the remaining issues, I’ll check the bike again.
Unless the factory made a quick substitution, I suspect the carburettor has been replaced for some reason…they do wear out you know and some people just use what they have!
Both tyres were well beyond their ‘best before’ date
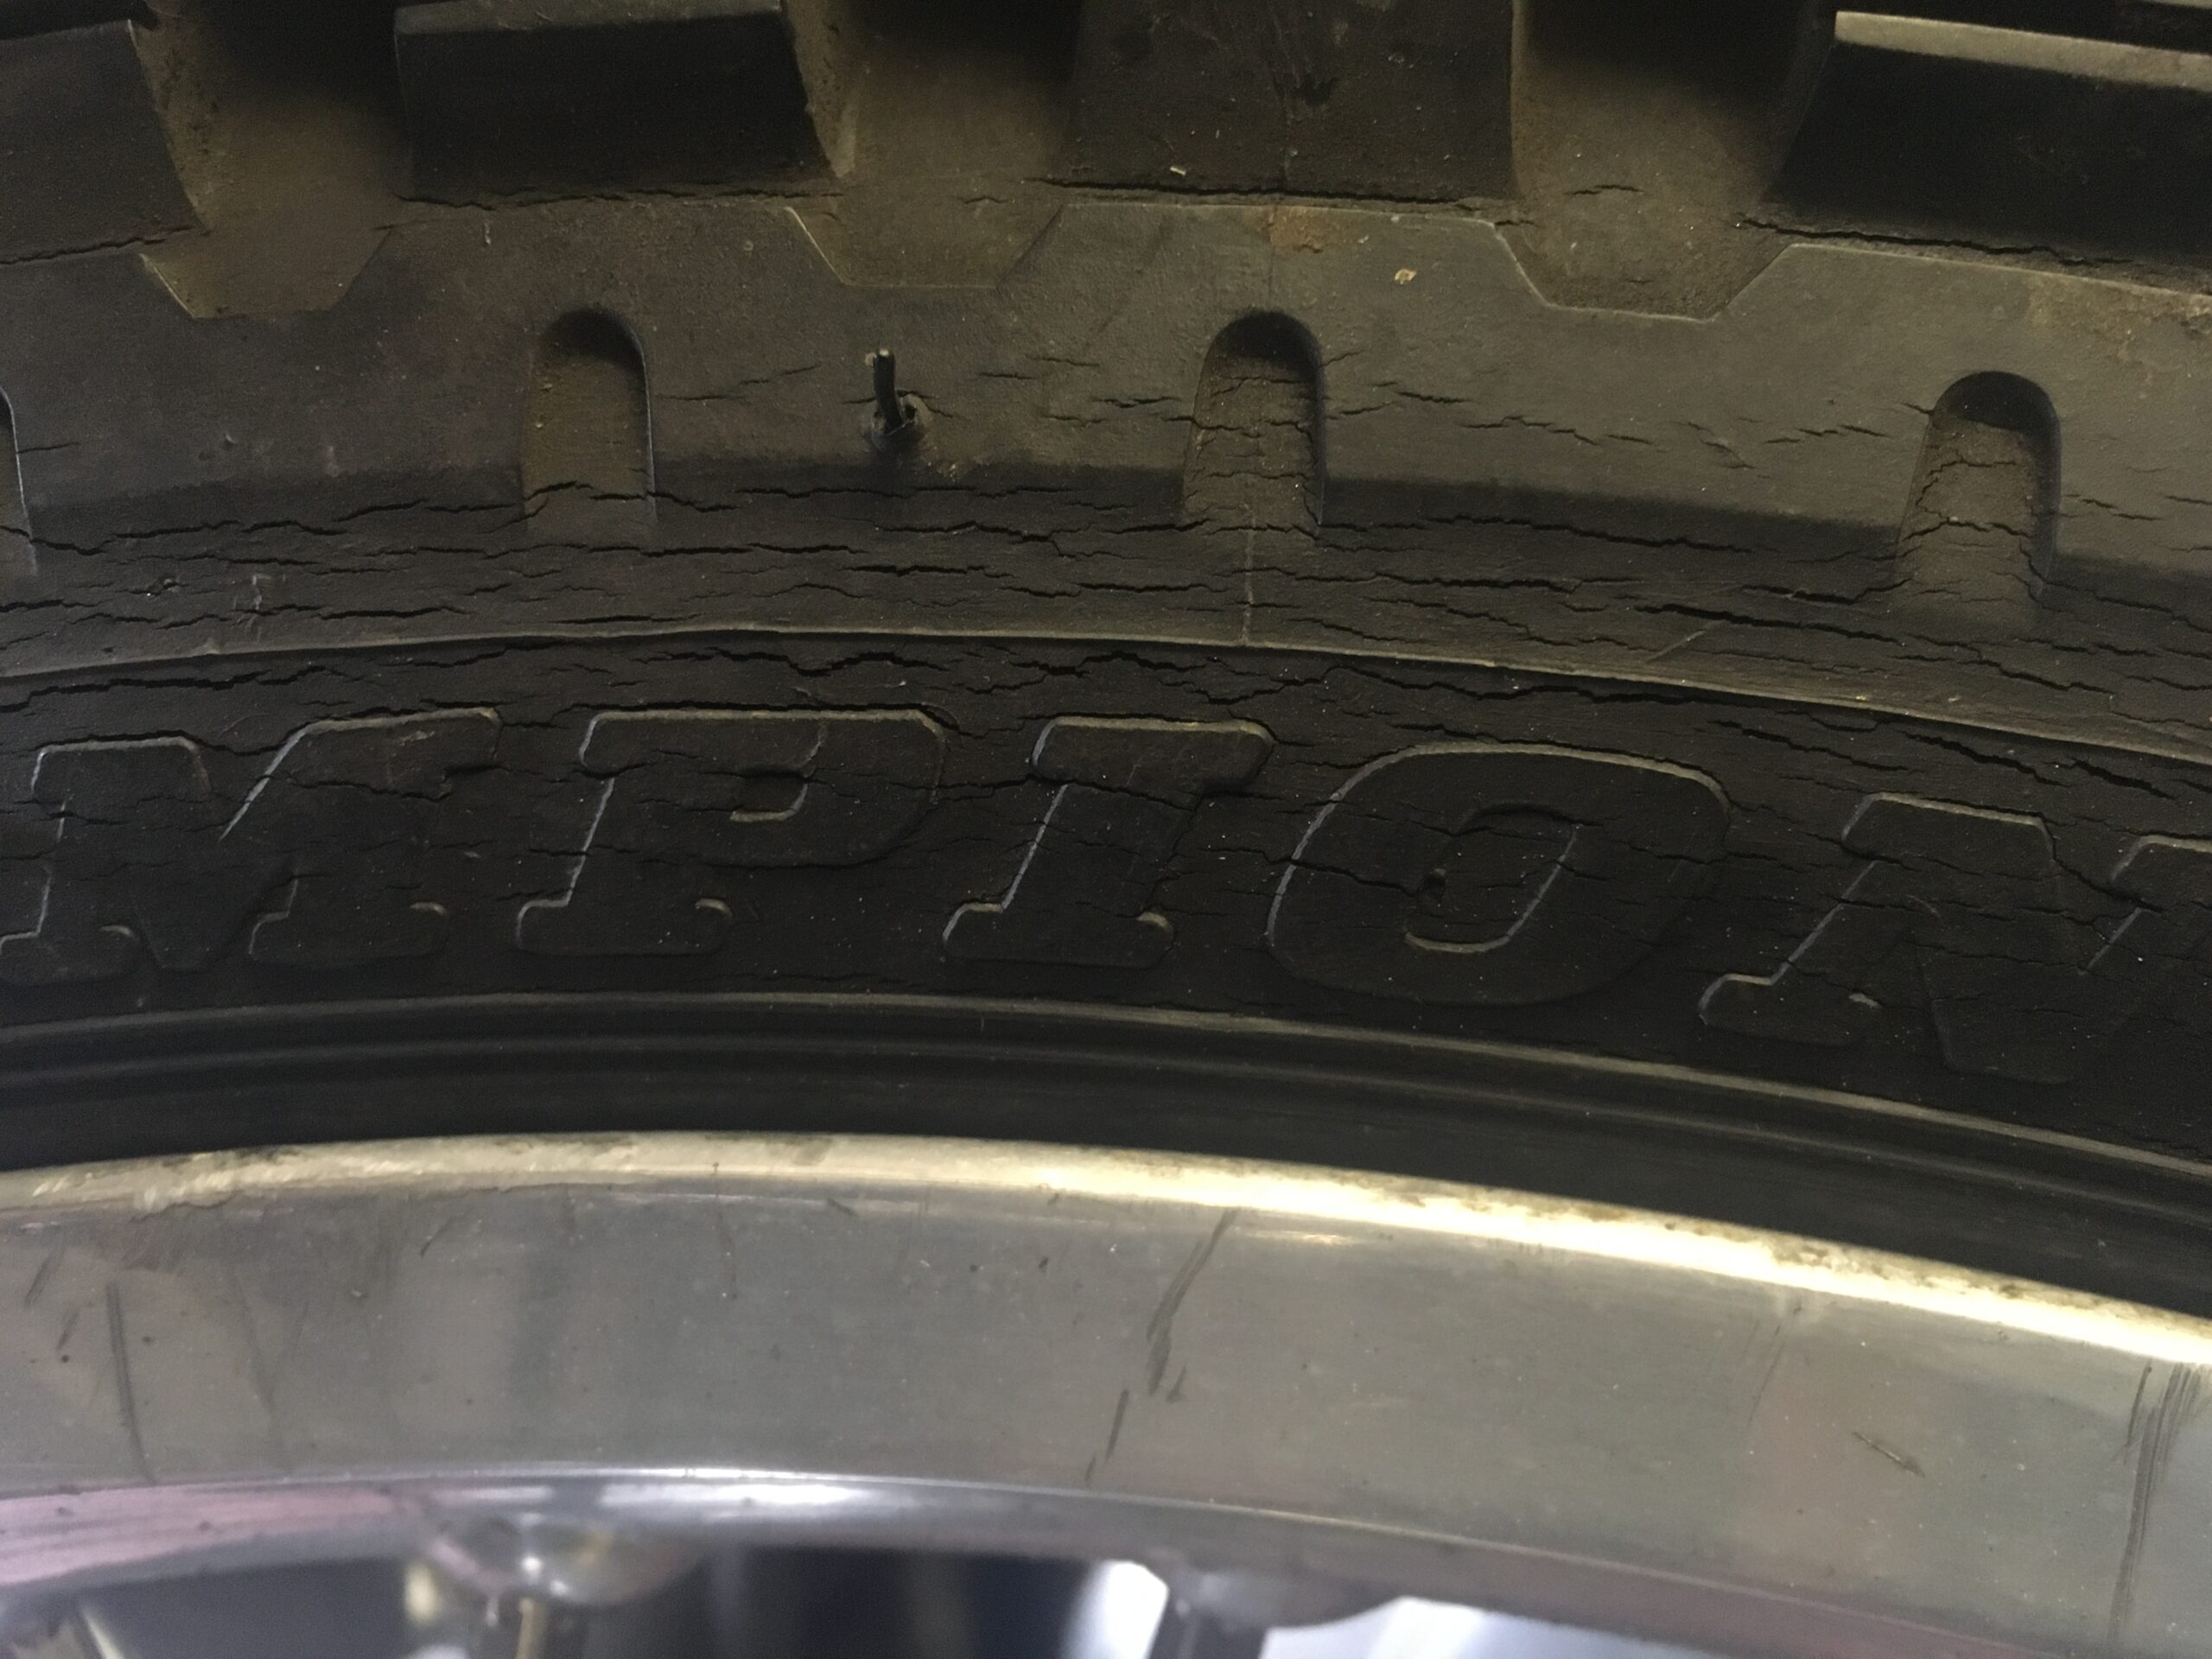
Ancient and perished
When I went to view the bike, the front tyre needed a bit of air in it, but the tyres looked used but okay. After riding it home though, the reality became apparent.
The front tyre had no four digit date code on it, which means it was manufactured before the year 2000…it was 23 years old and I suspect its tube and rim tape were of a similar vintage.
The sidewalls of the tyre were very badly crazed and perished!
The rear tyre looked part worn but the date code on it was 1201, that’s December 2001…22 years old!
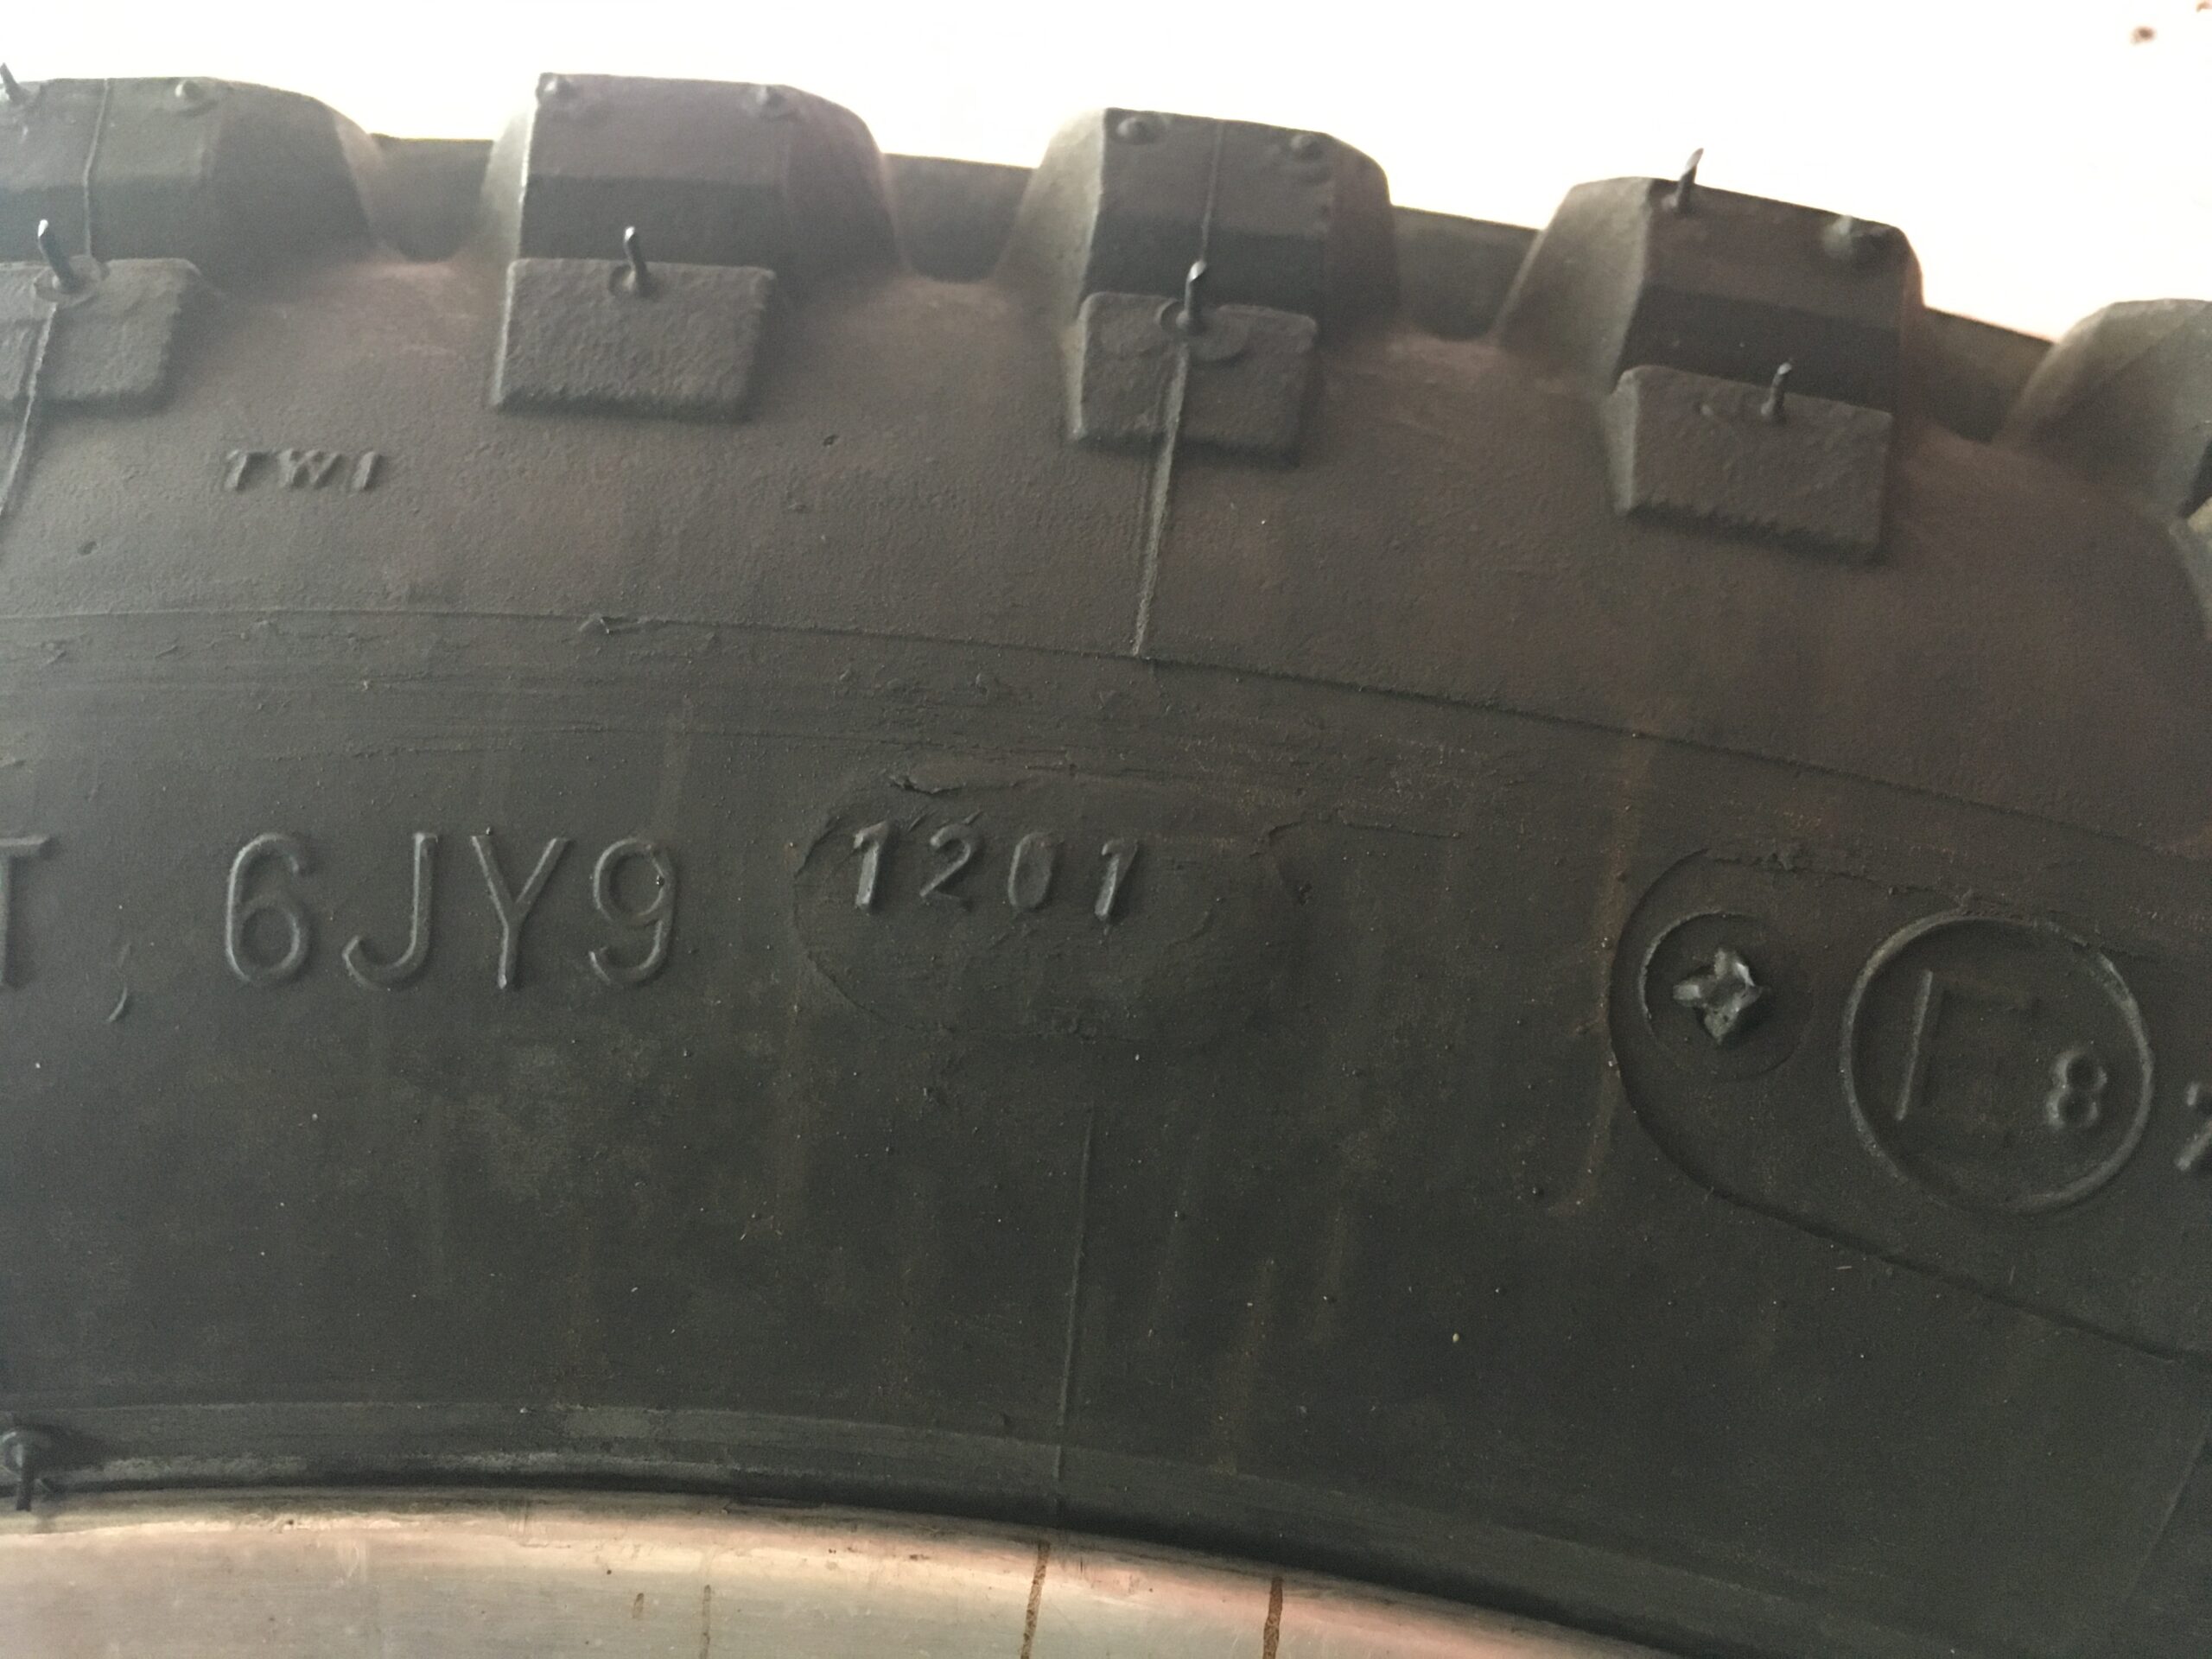
Older than some of my friends
The simple fact is that both tyres are well beyond their safe ‘best before’ date and will be replaced by a pair of Pirelli MT43s, complete with new Michelin AirStop inner tubes and rim tapes.
Some light relief for Johnny at Value Tread in Hexham.
There were further problems to be discovered in relation to the wheels and rear brake plate.
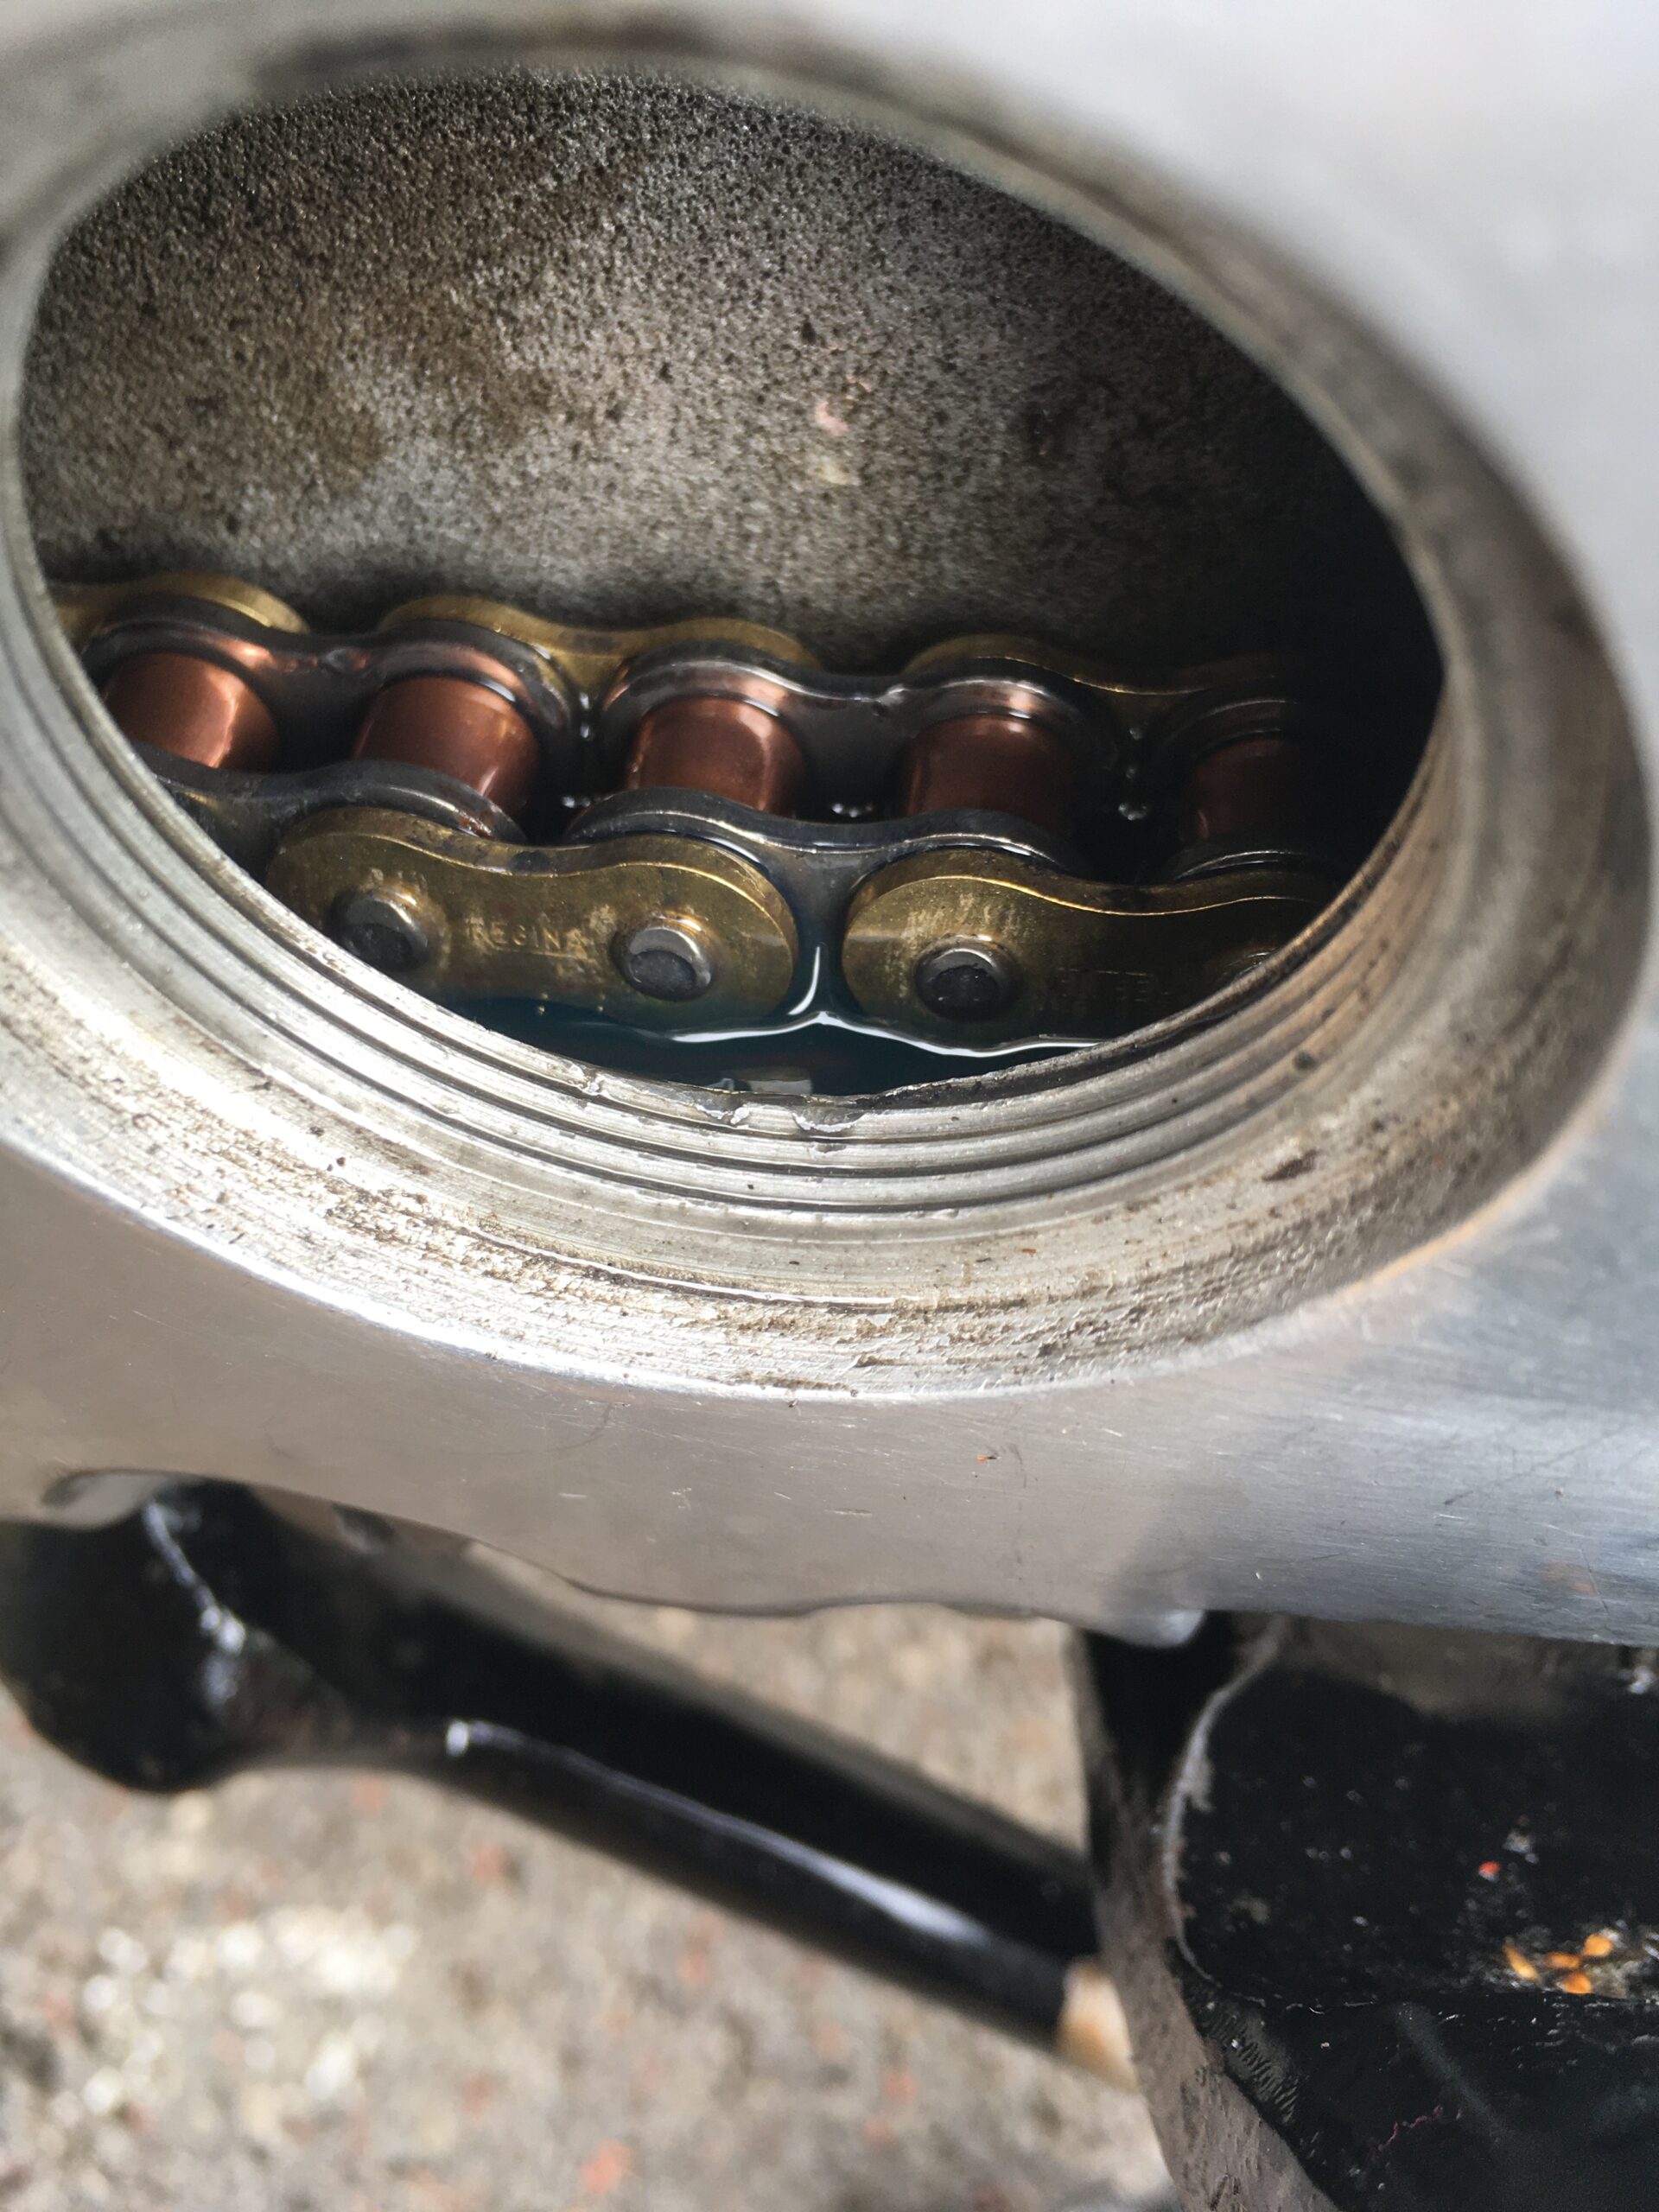
Rear chain worn out
I went to check the slack in the rear chain, only to find out it is probably the most worn rear chain, or in fact chain of any kind, that I have ever seen. It was totally knackered and it could bend sideways almost as much as it could in the design direction.
I don’t have a picture yet as the chain is still on the bike, but it is (s)crap.
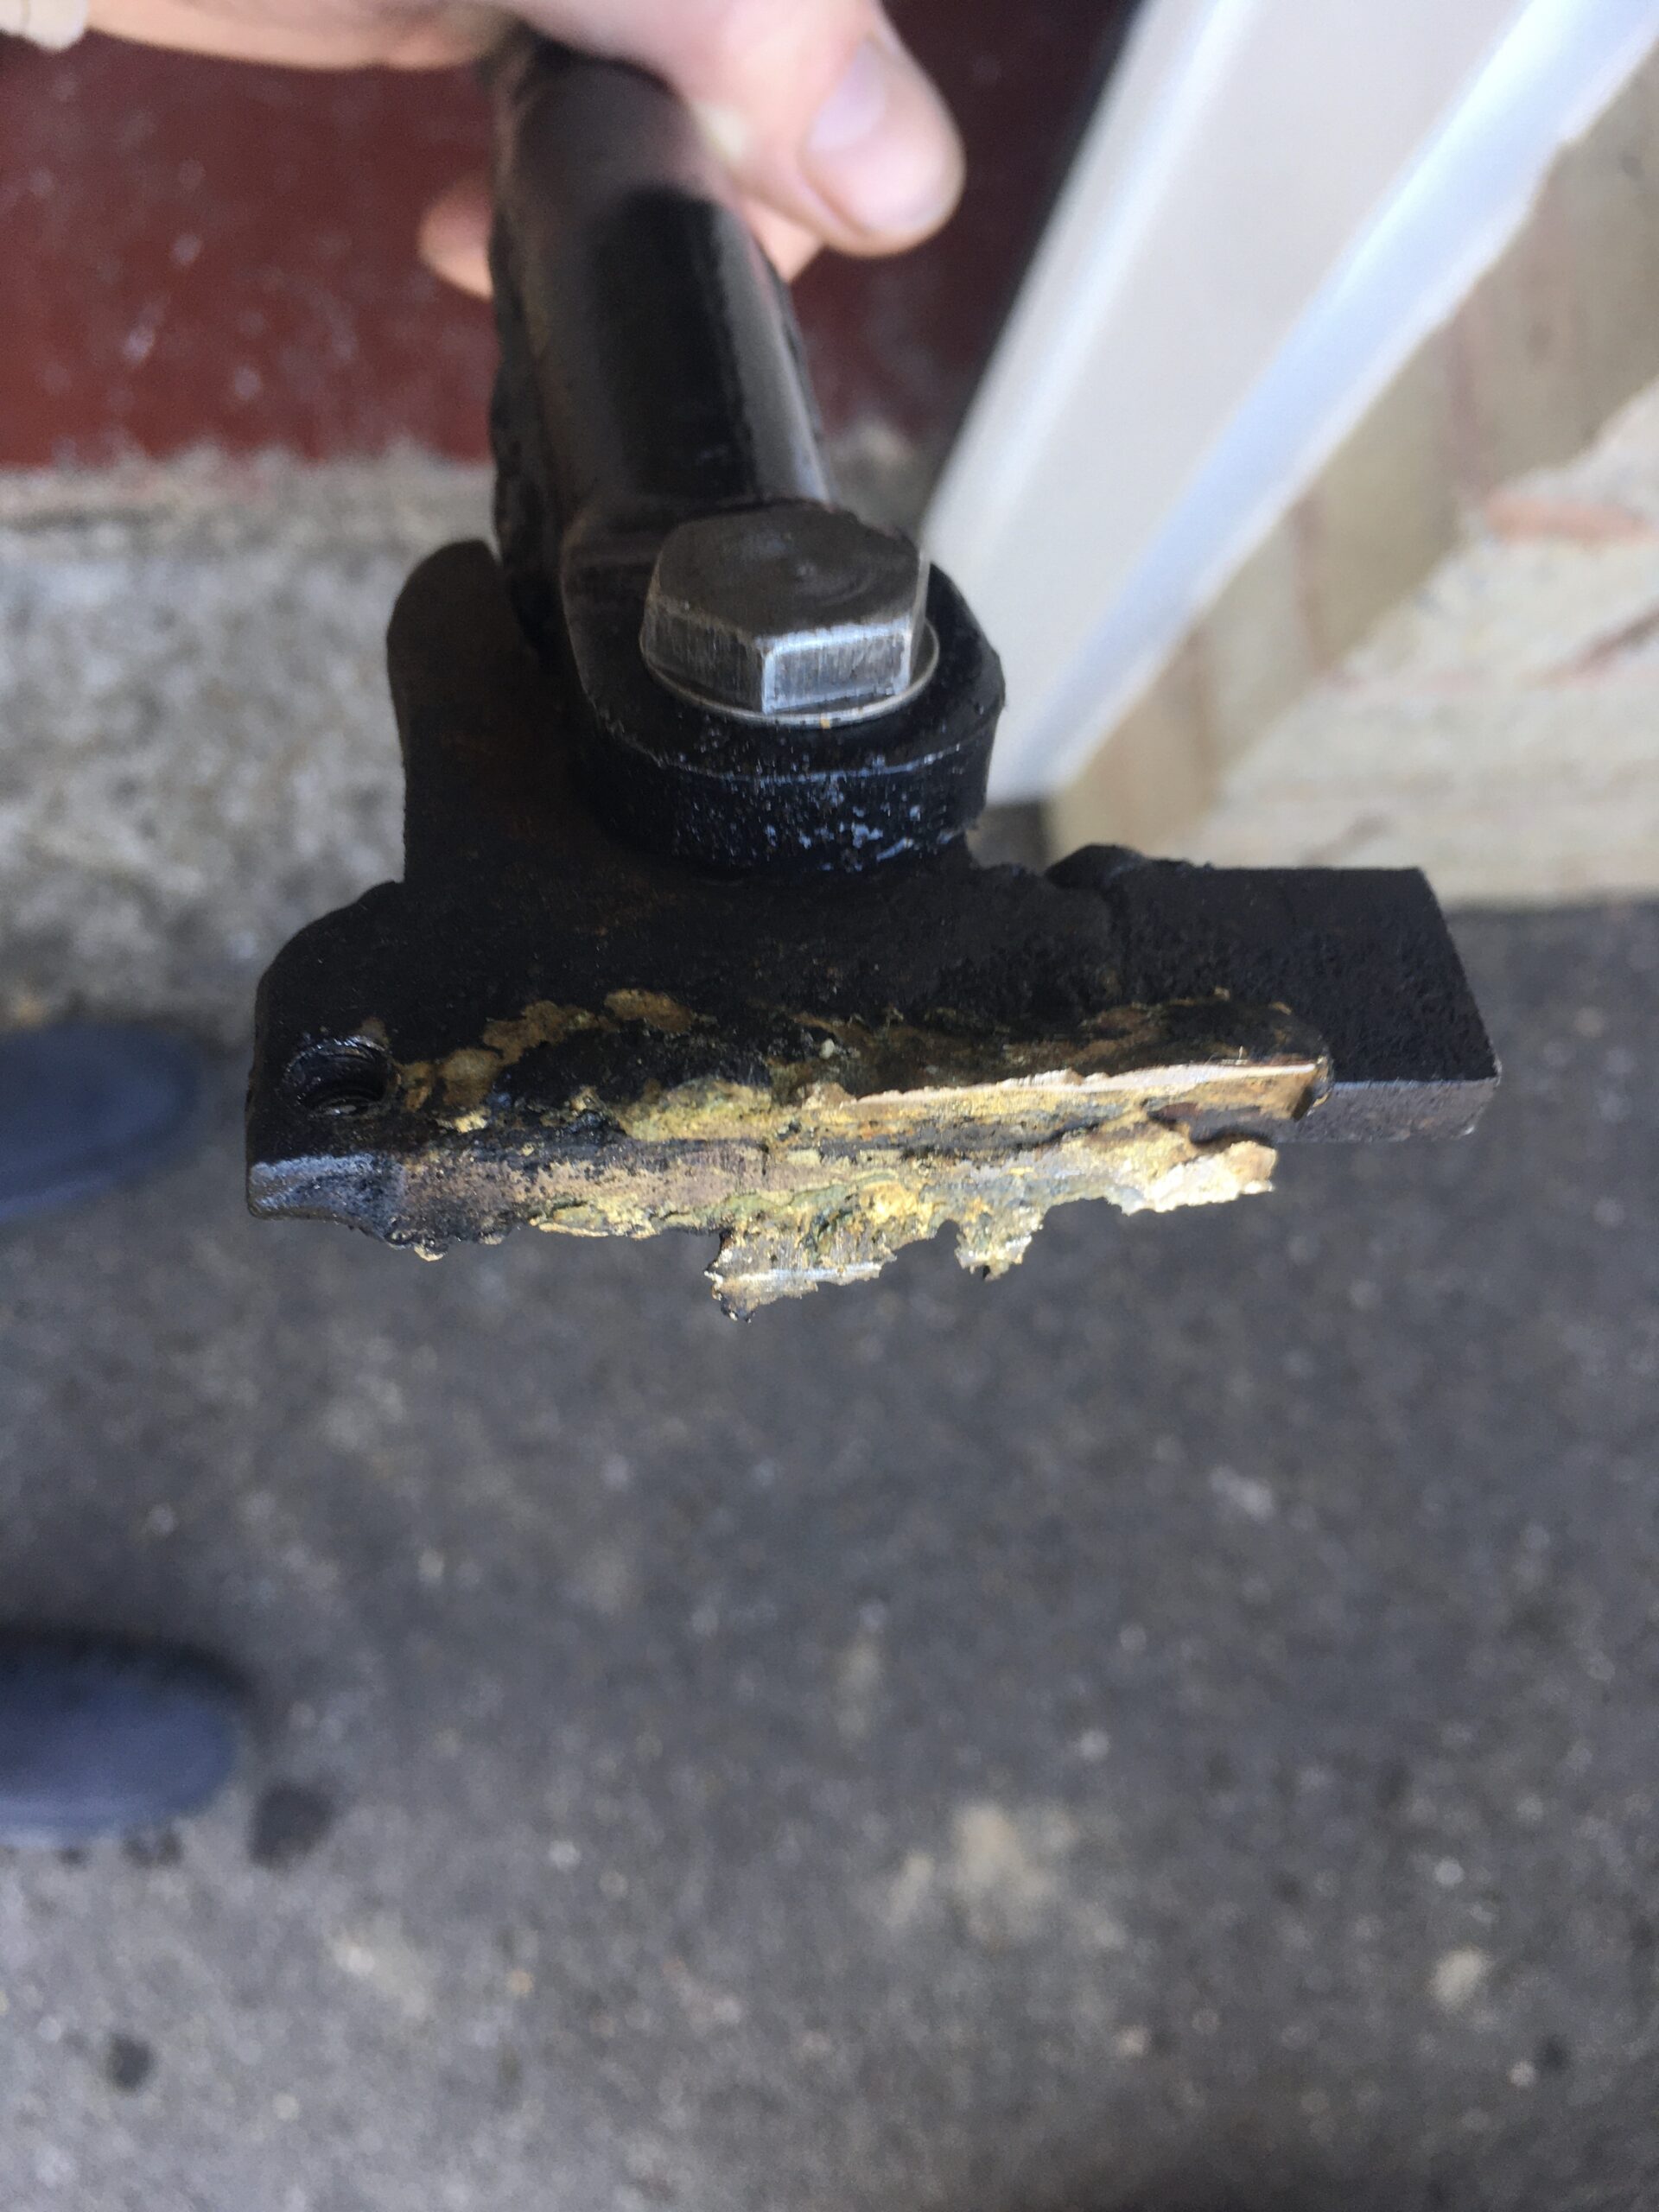
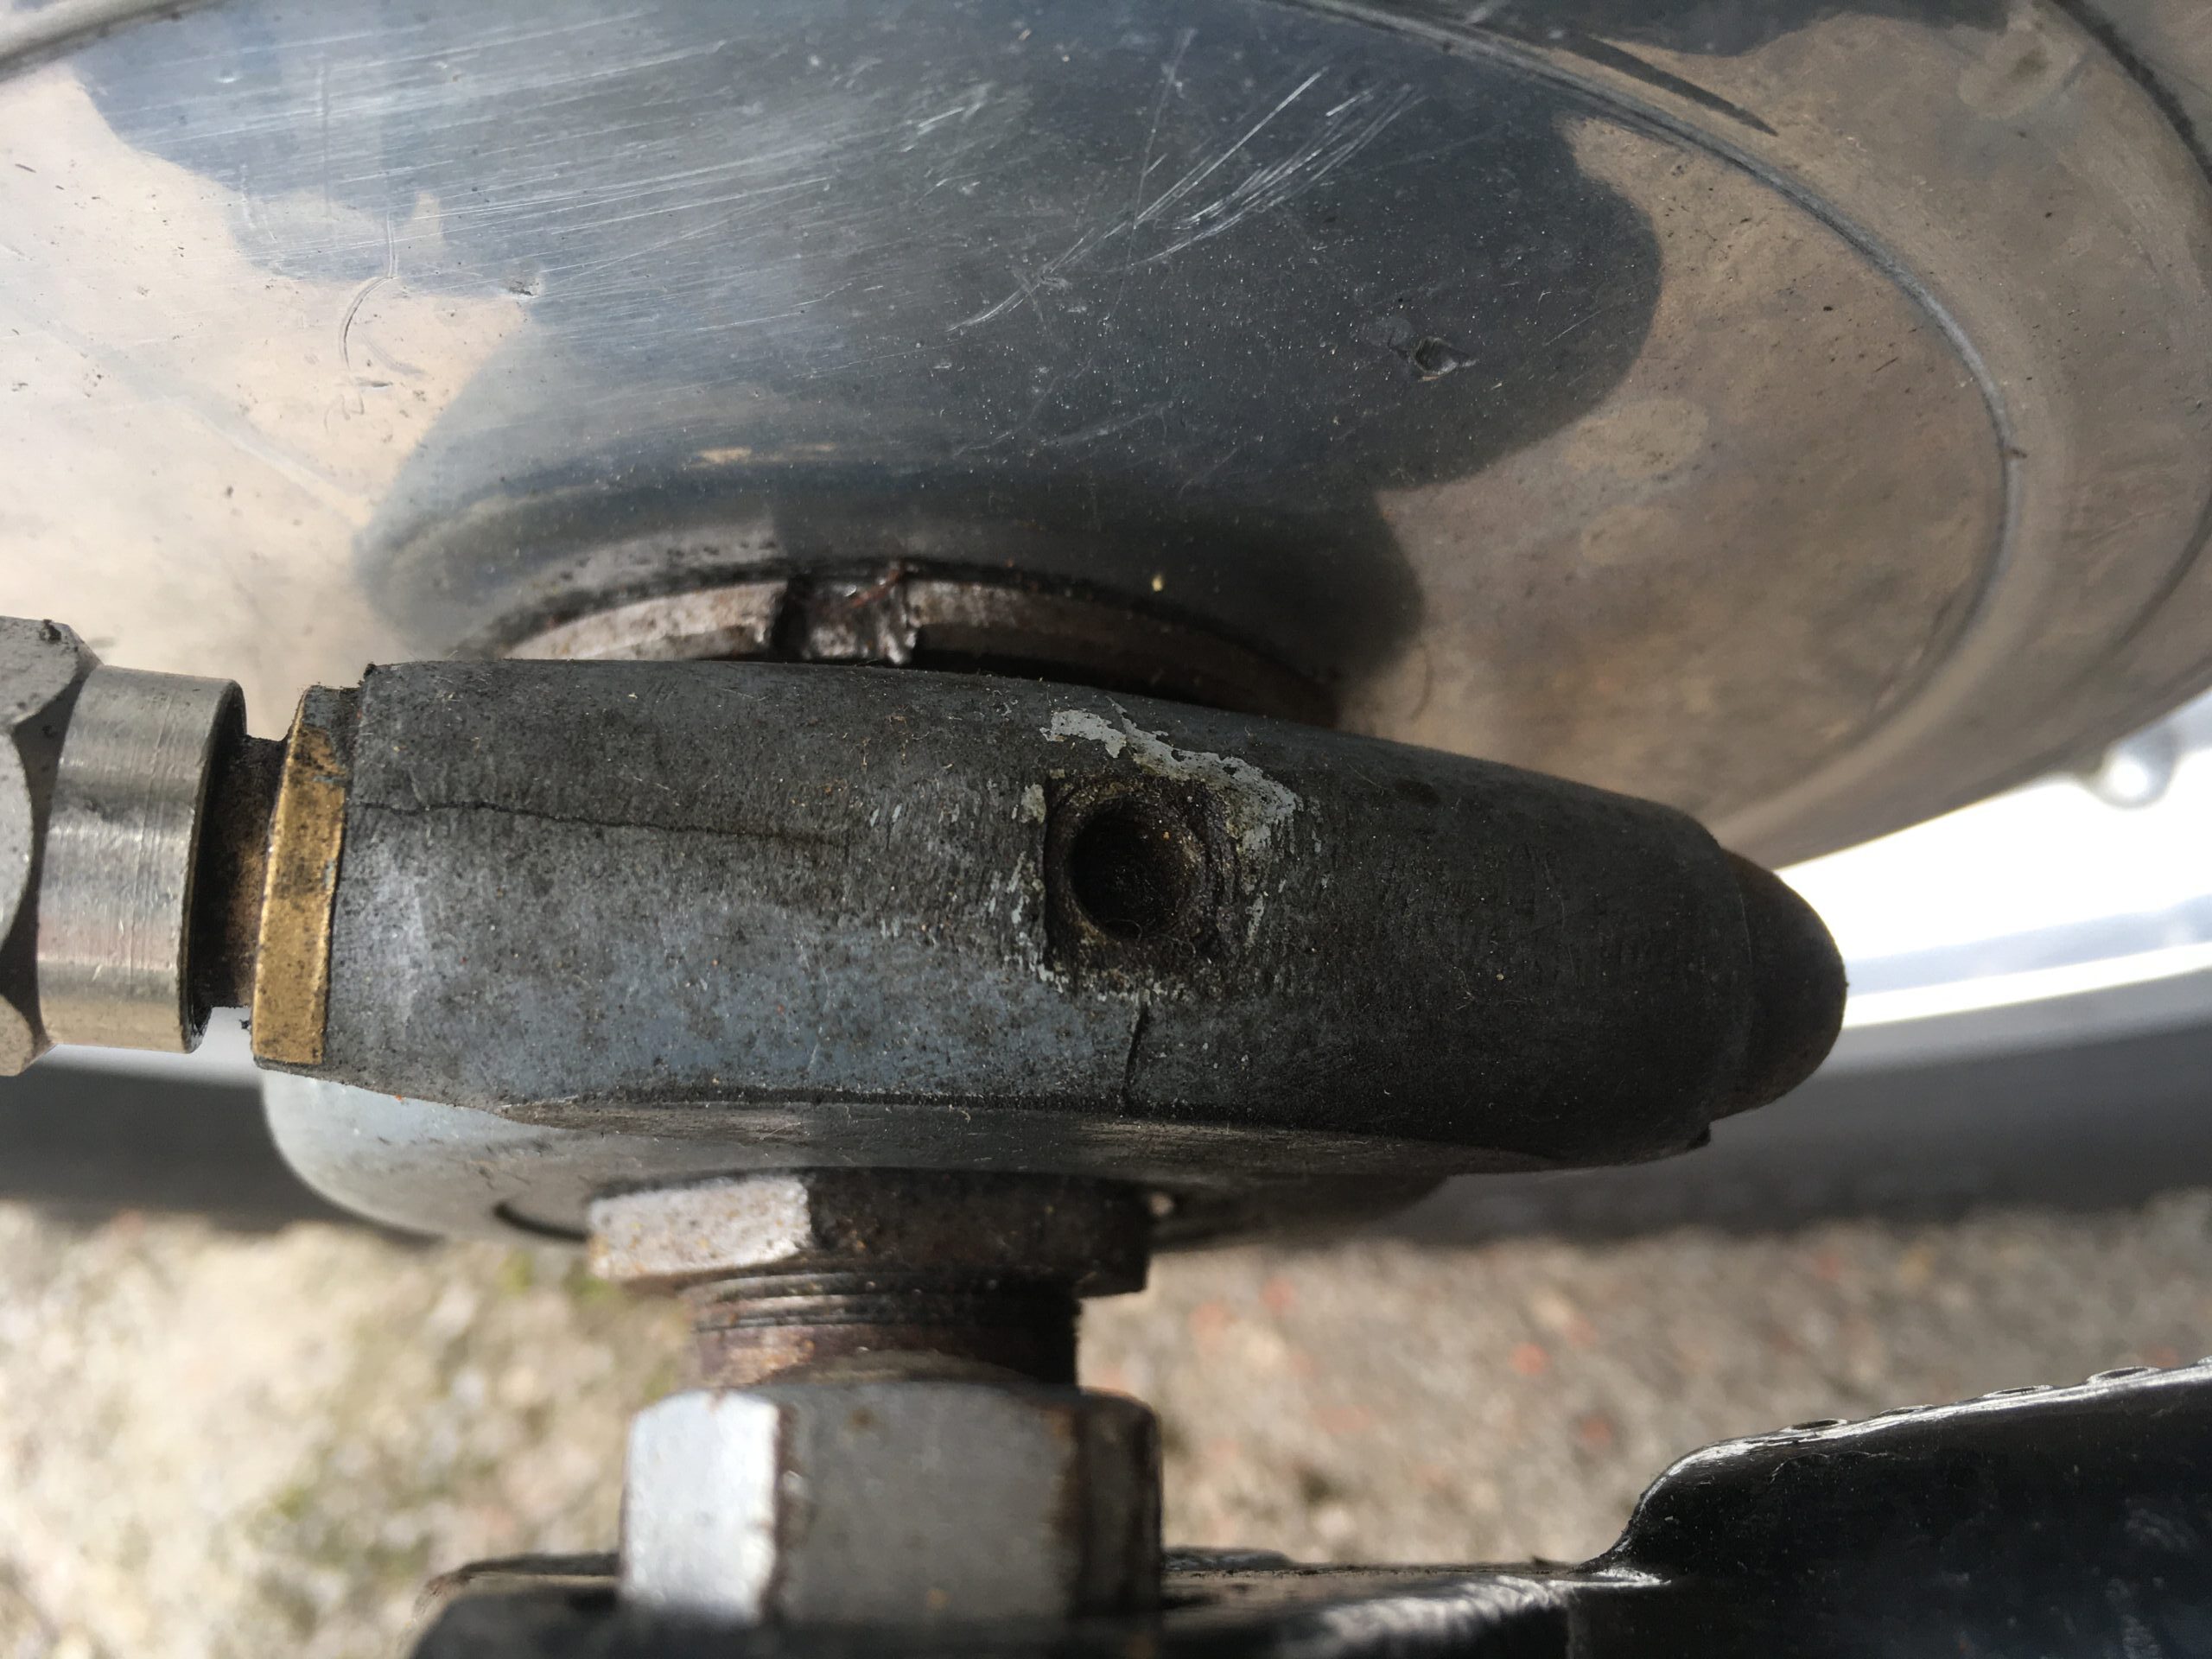
Rear brake plate bush
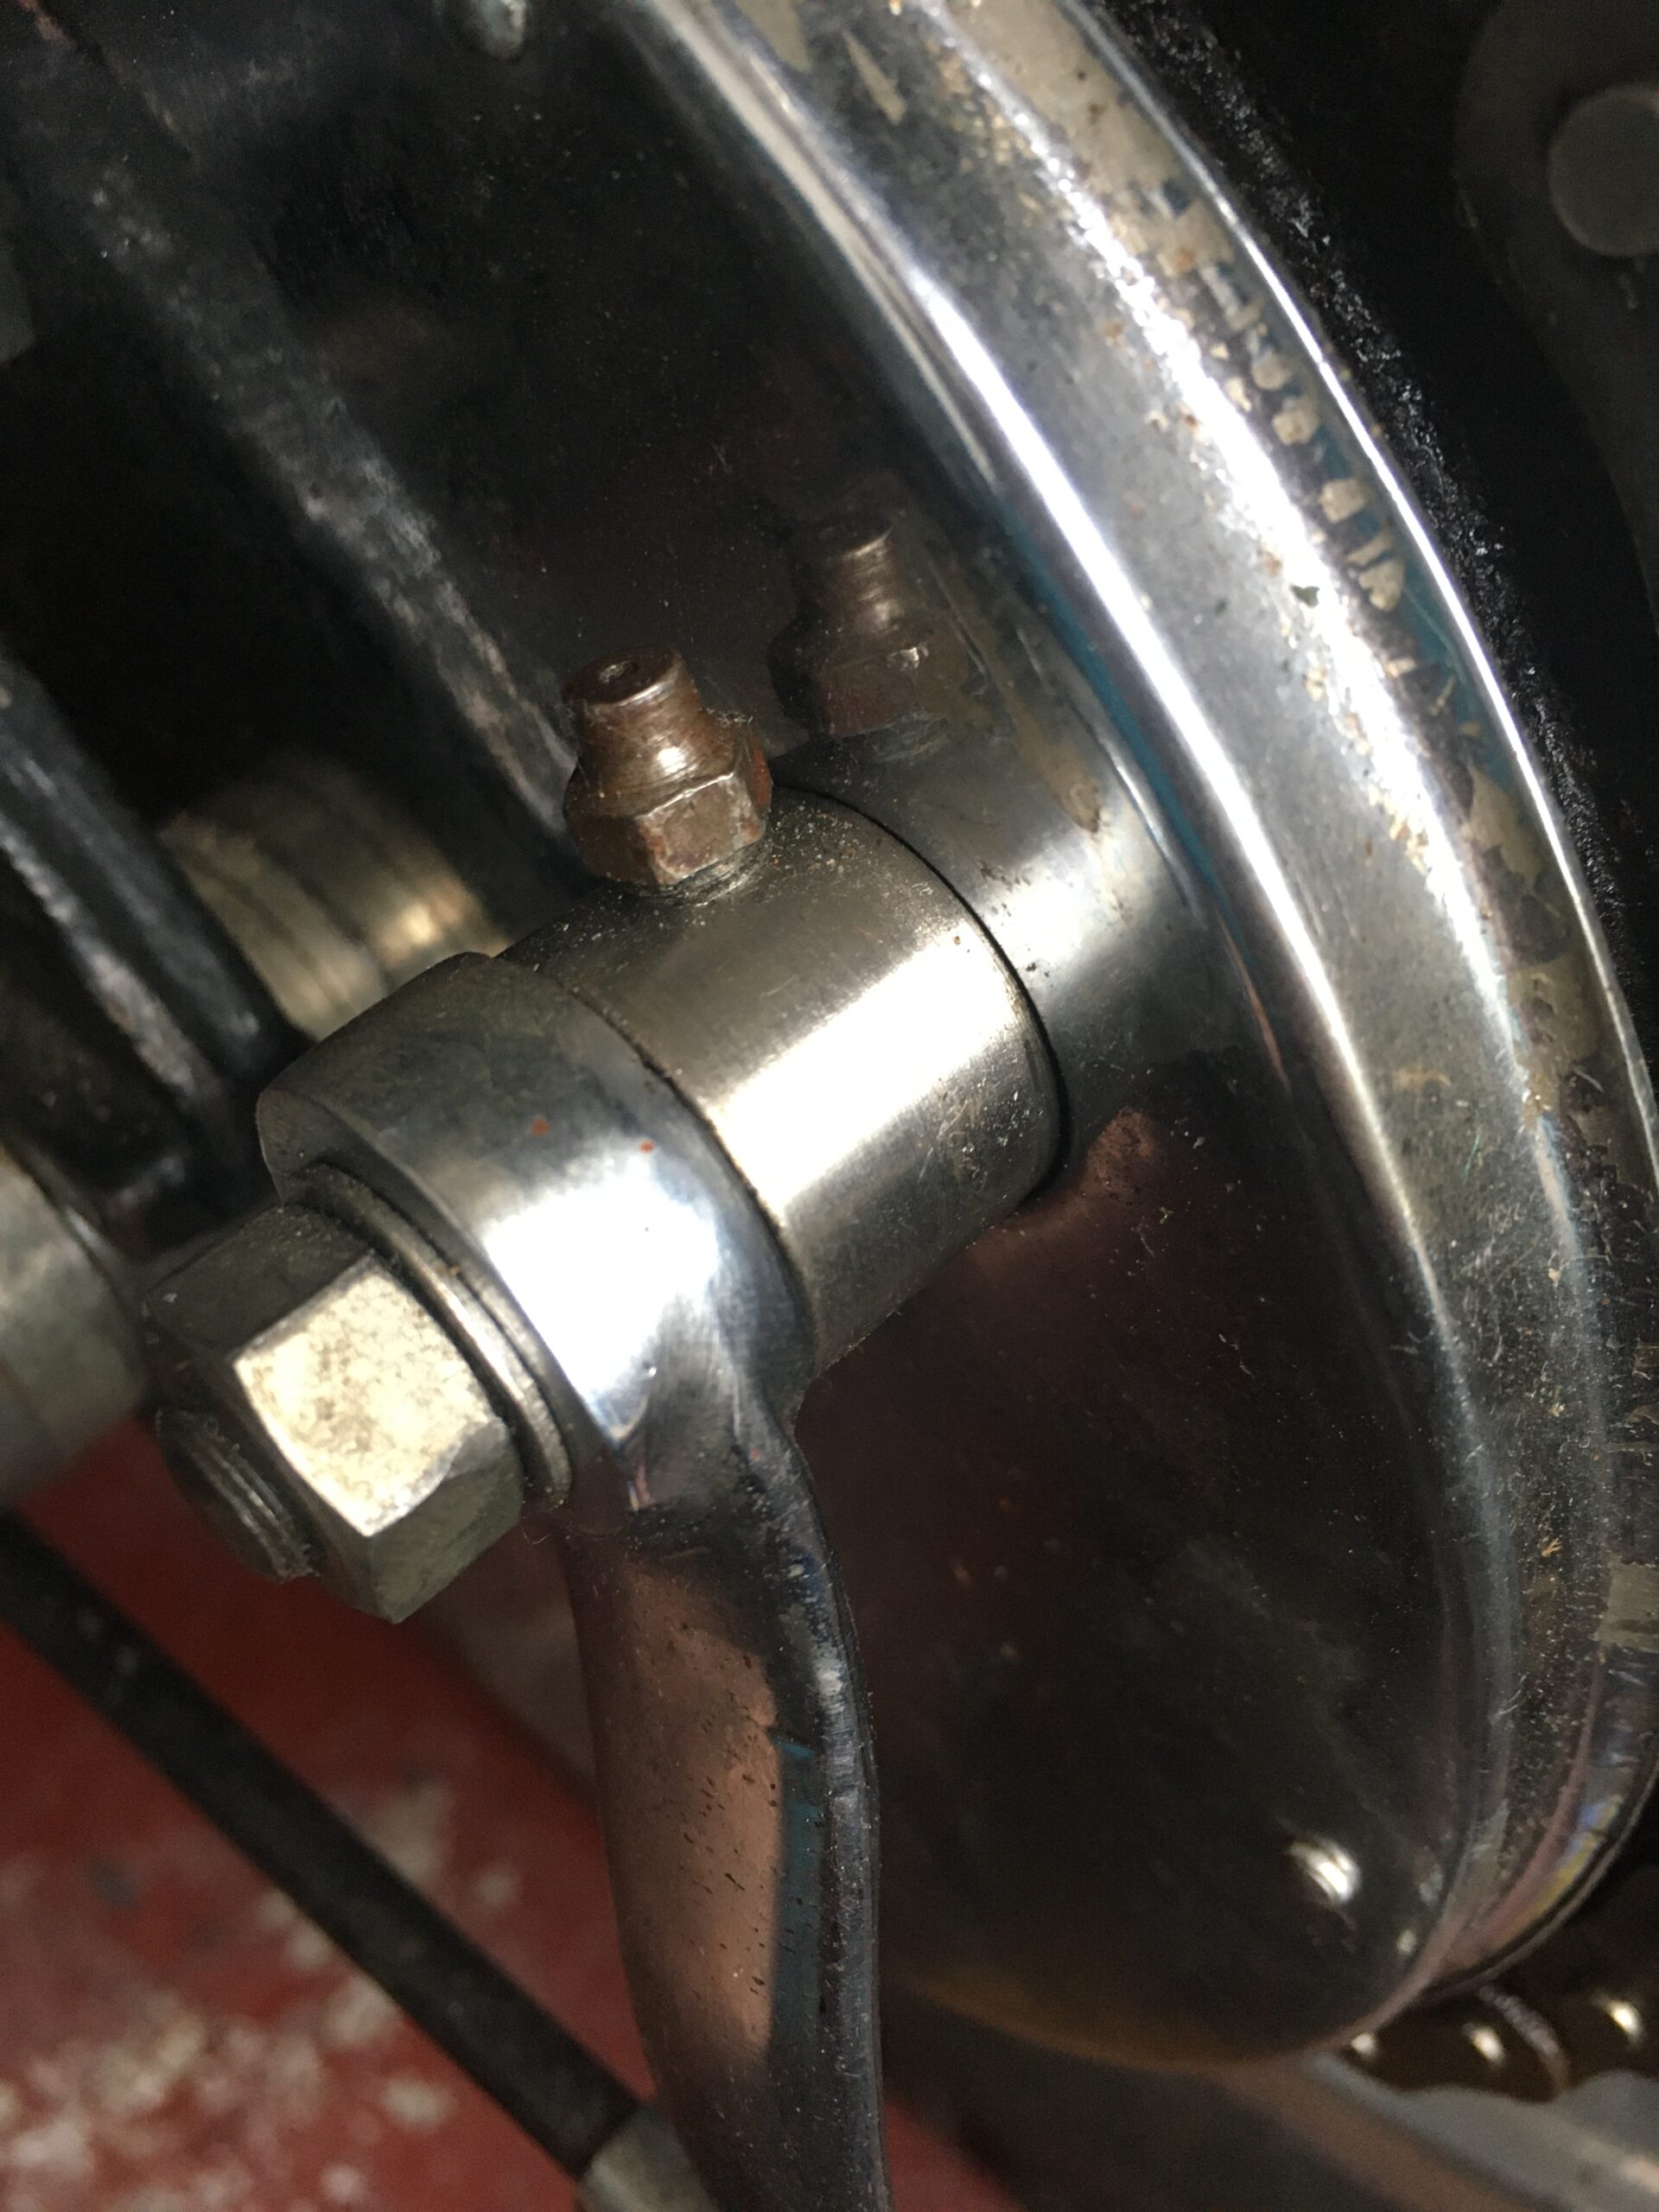
It’s the bit with the nipple
I noticed when testing the back brake, that the bush through which the shaft for the brake shoe expander passes through seemed very loose indeed on the brake plate.
I contacted Steve Surbey at AMC Classic Spares, hoping to find the necessary replacement part as I couldn’t find a part number.
Steve explained that the bush is actually part of the brake plate and would need brazing back into place.
Deep joy…that’s another job to complete once I take the wheels off.
Have you had enough yet? …no? That’s good, because the best may be yet to come!
No lights…duff battery
I’m guessing the seller charged the battery somehow when I went to see the bike; I seem to remember the headlight came on. The light switch is near the front of the seat, rather than on the headlight. I only checked the headlight briefly when I first tried the bike; I had noticed the brake light not working due to the incorrectly aligned switch, but the red light came on when tested.
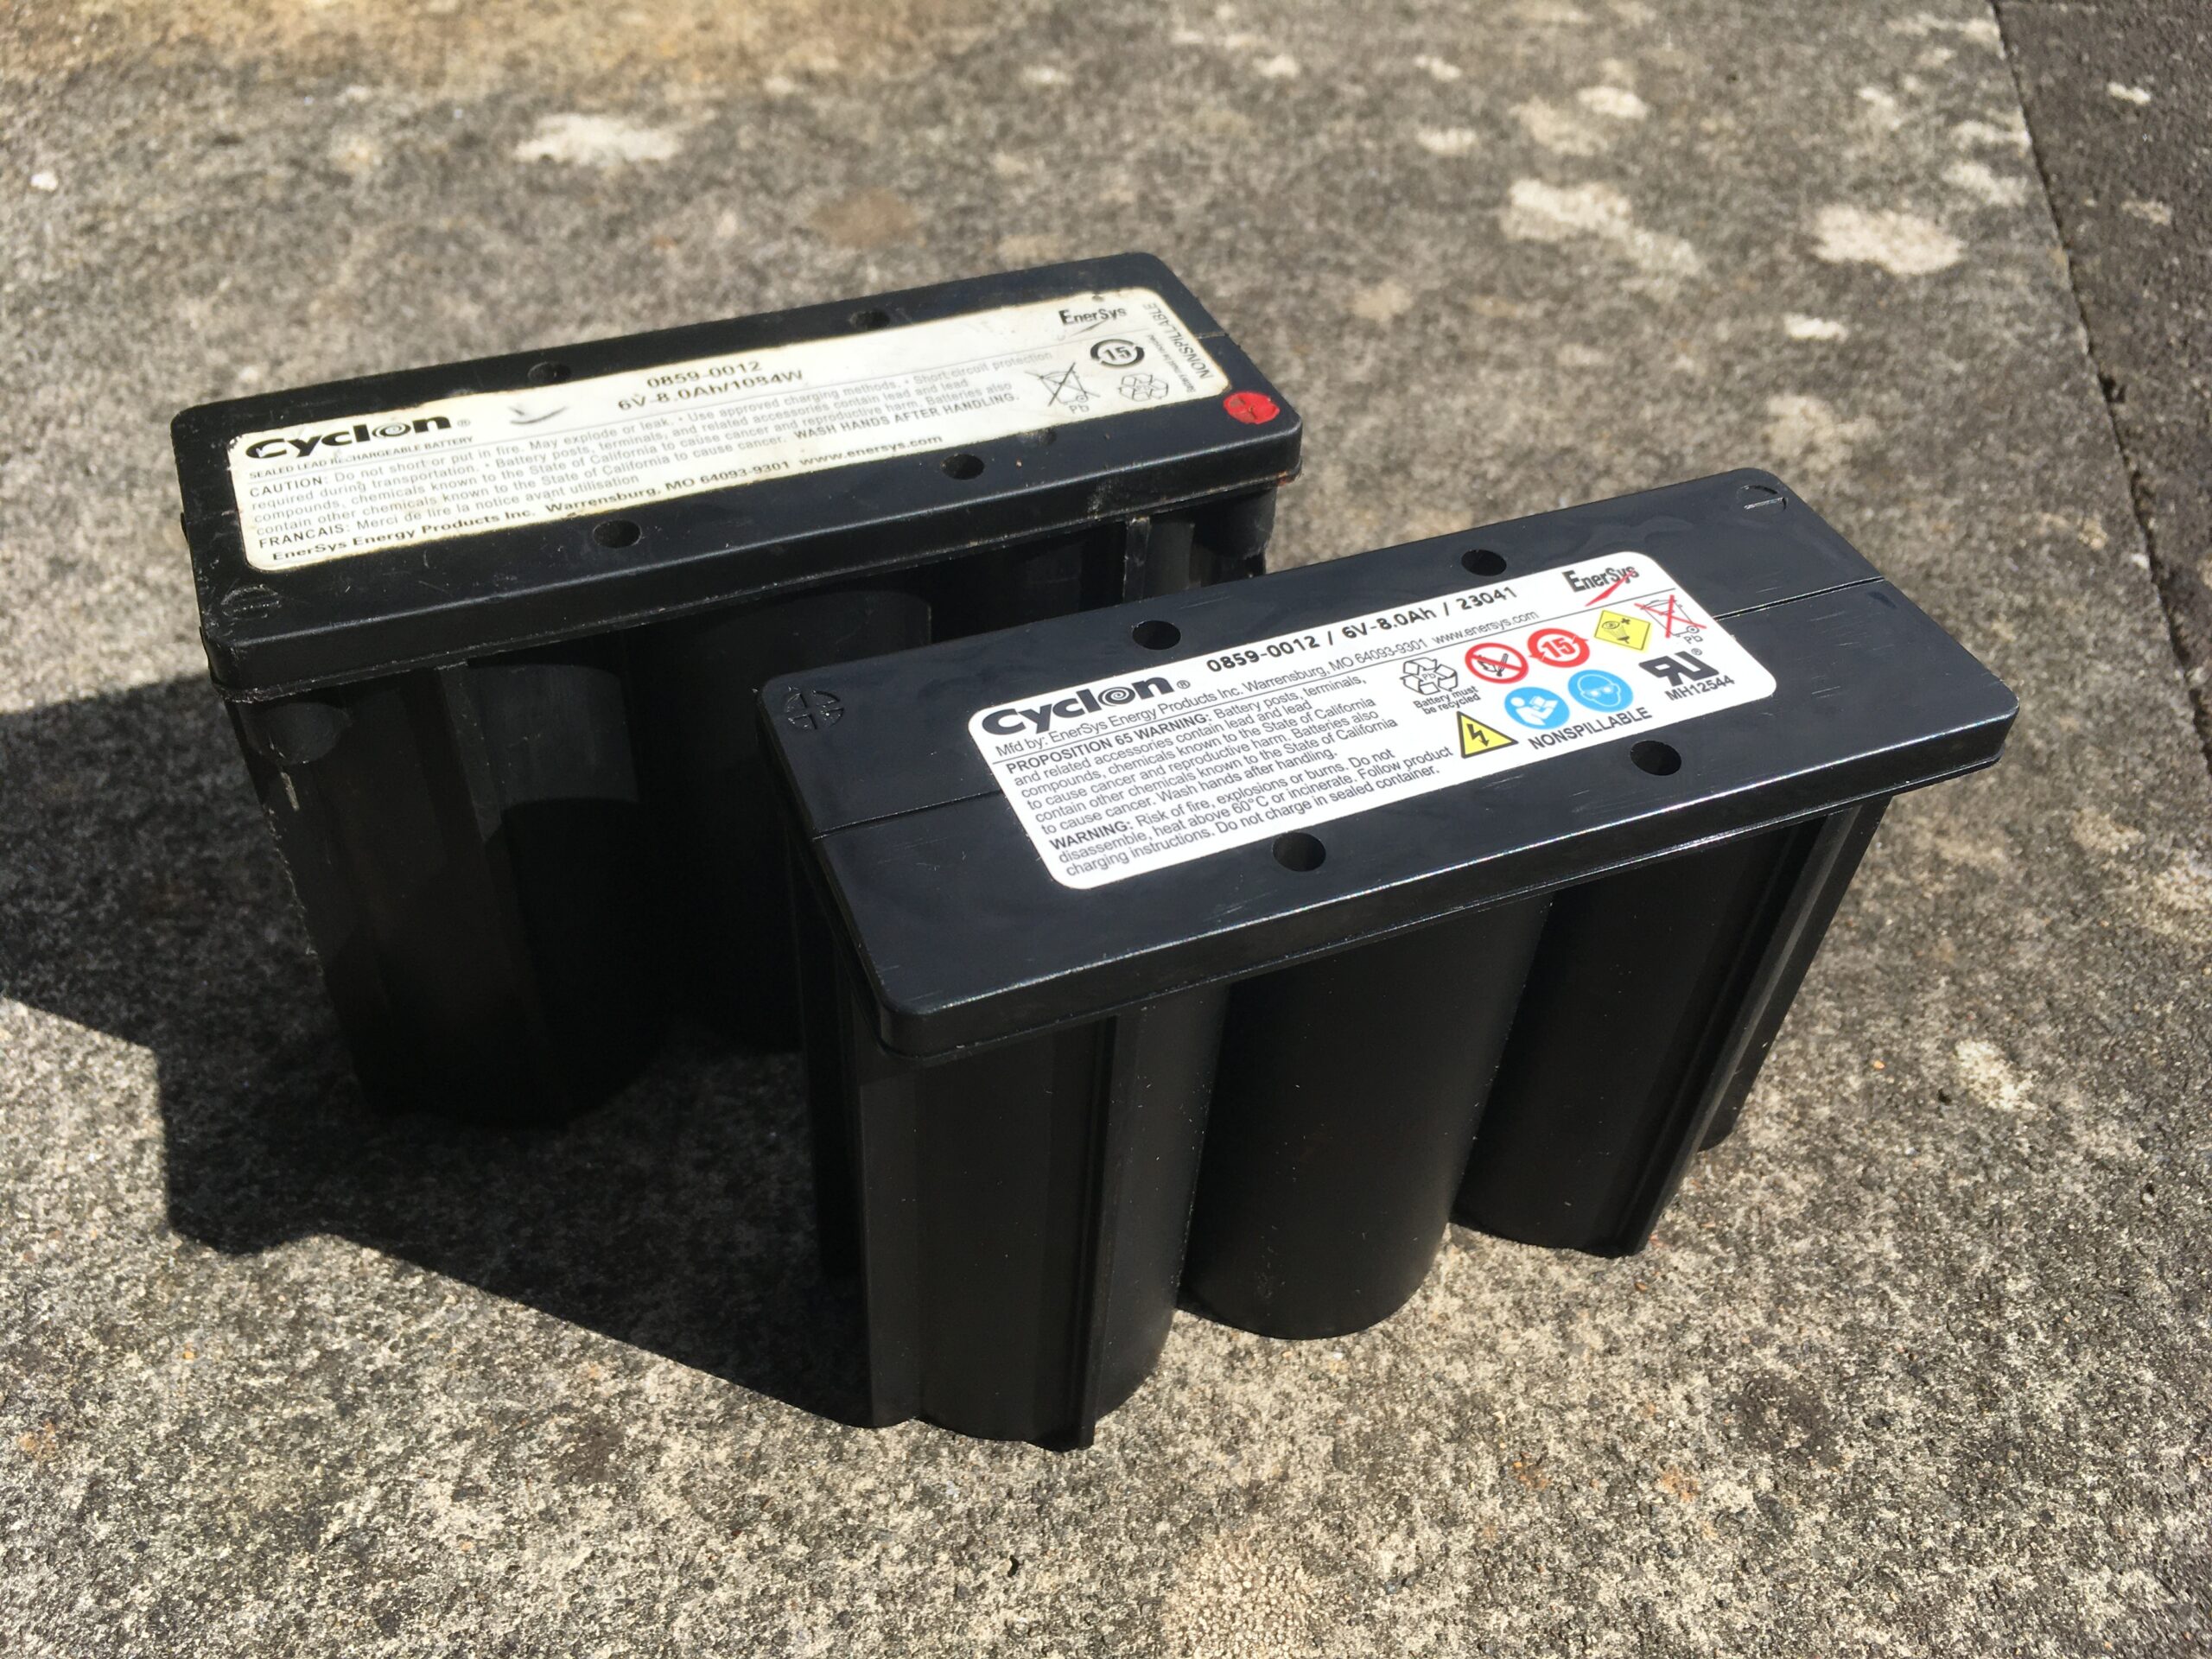
Cyclon 6V 8Ah
When I got home, I pulled up at my garage and noticed no reflection from the headlight. There had been some movement on the ammeter on the way home, but not much.
I checked the battery voltage and it was zero. I tried to charge it and even with 30v across the 6v battery, it wouldn’t draw any charging current. The battery was scrap, so I replaced it with another identical one, a Cyclon 0859-0012 6v 8Ah non-spillable sealed lead acid battery. These are excellent batteries but not cheap.
That however, isn’t the end of the story. Testing revealed that the battery wasn’t actually charging.
What a mess the electrics were in
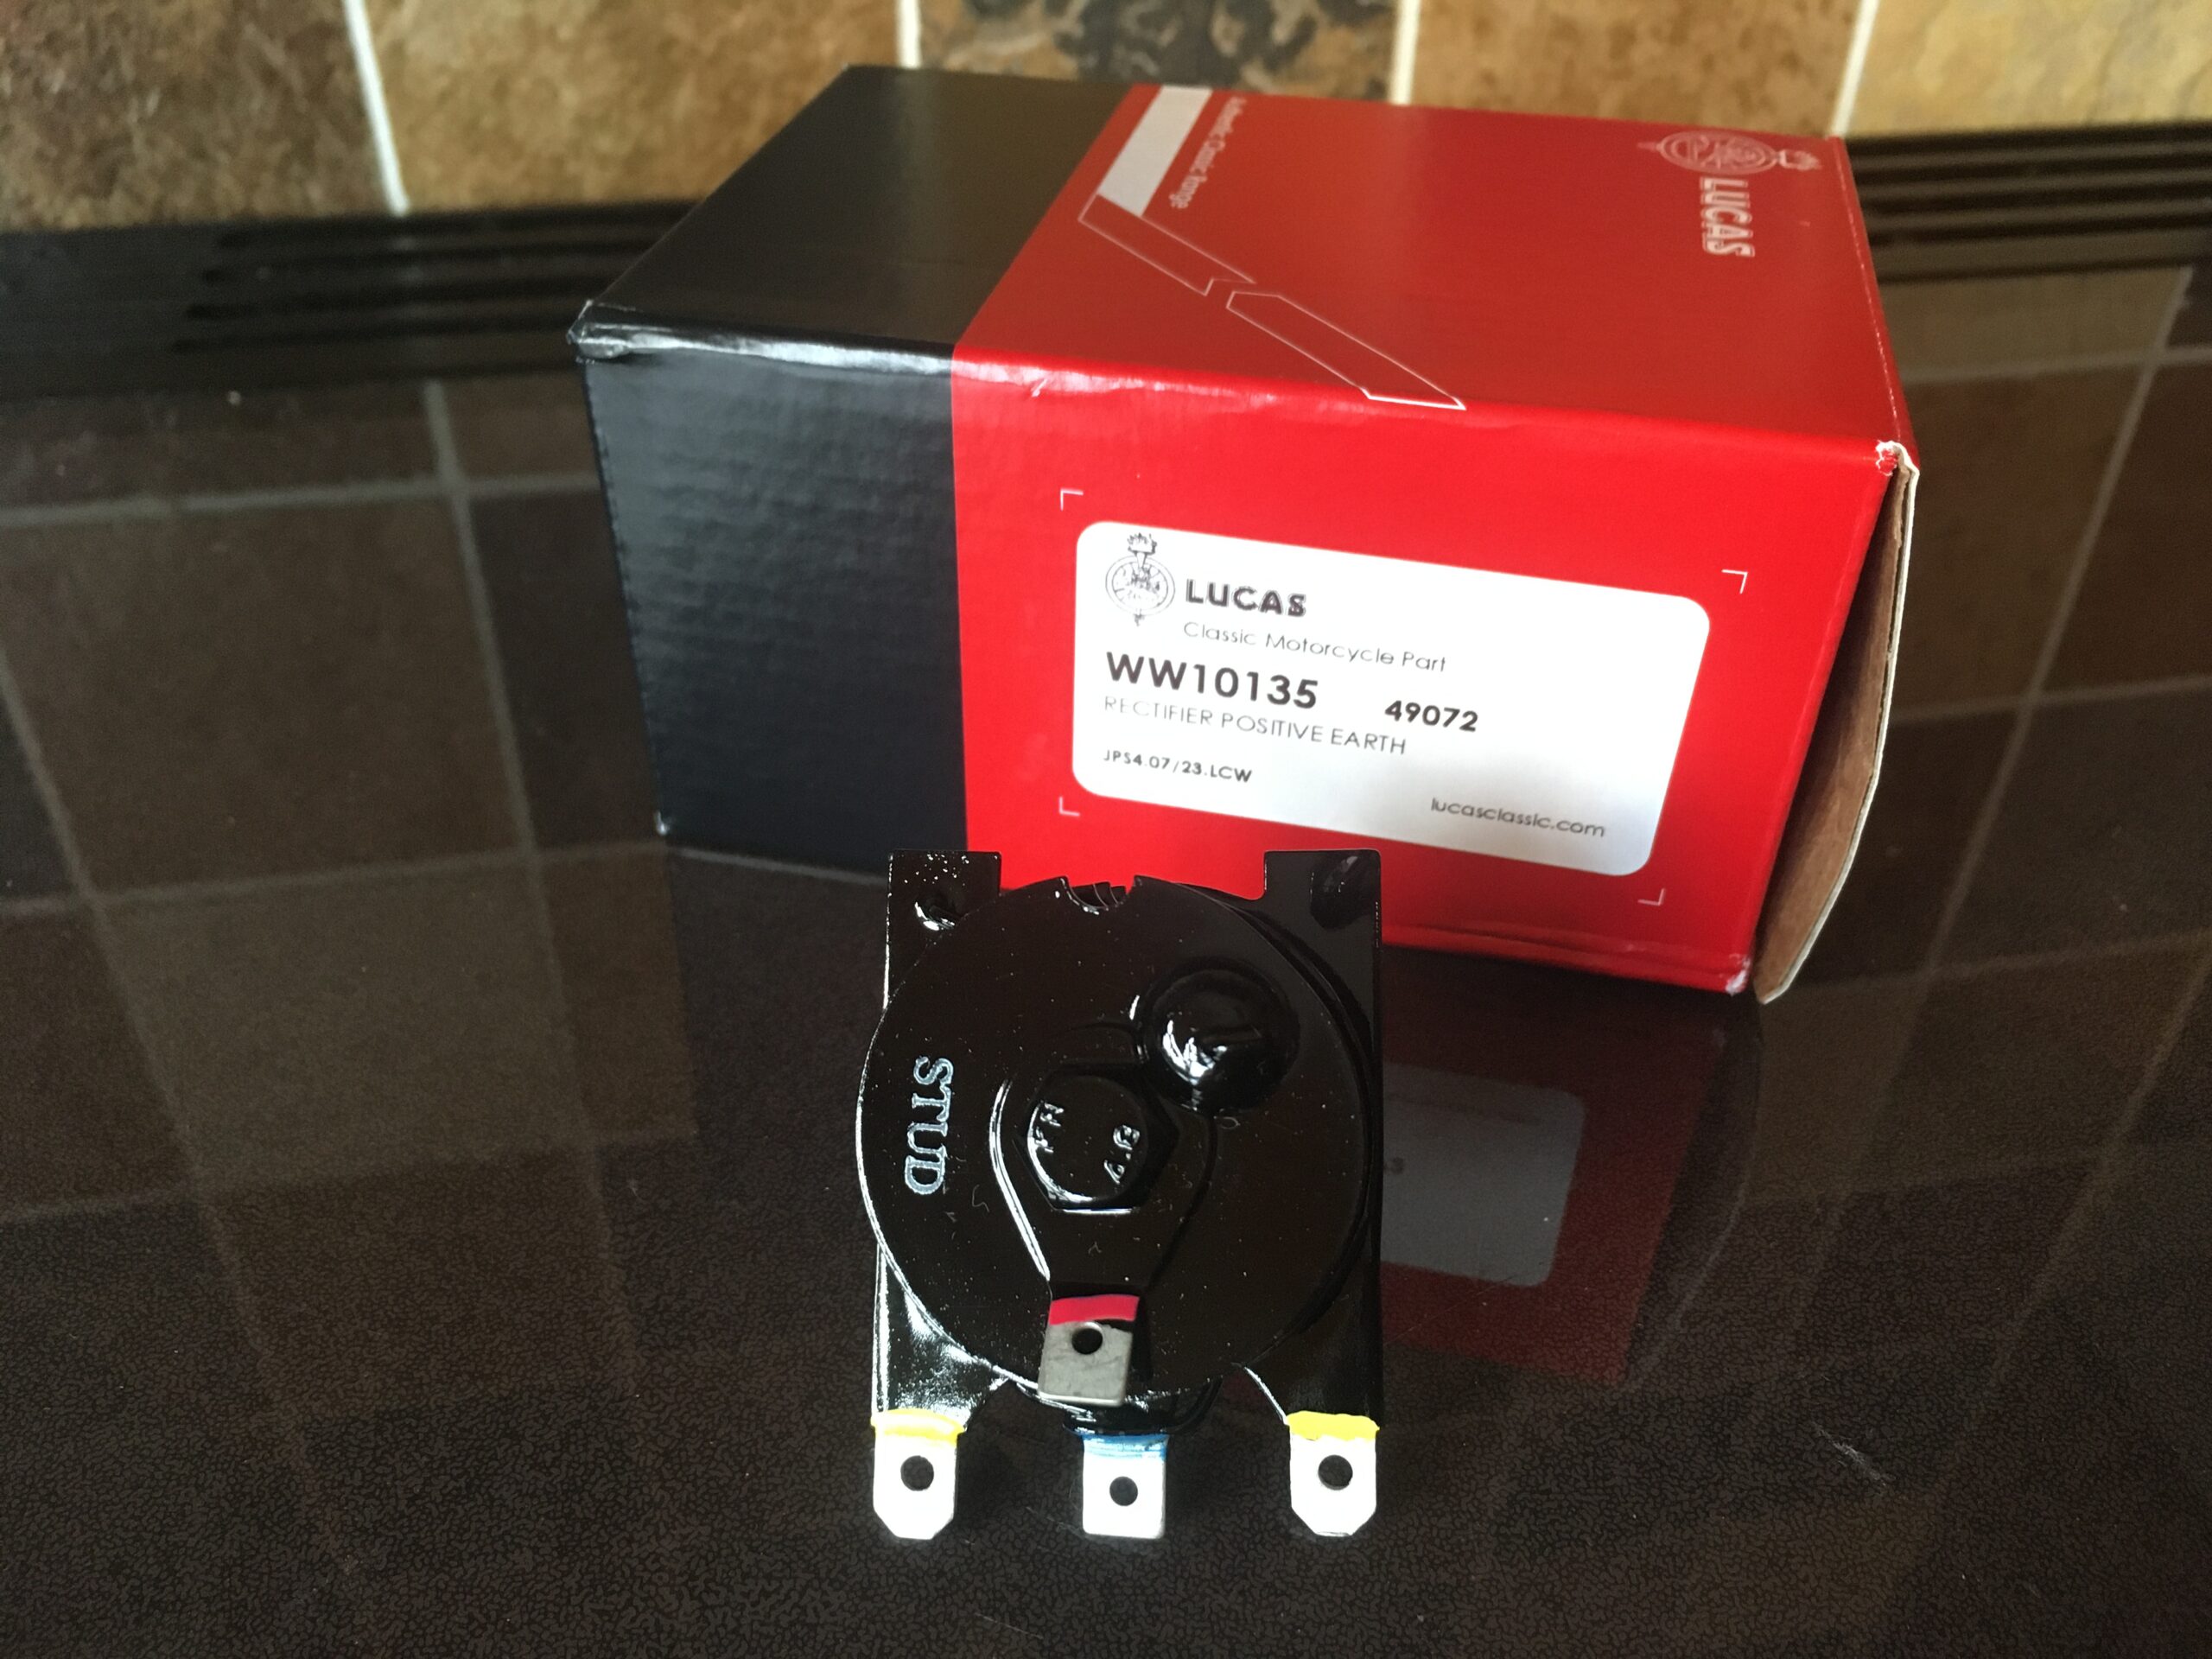
New Lucas Red Box Rectifier
I had already removed the seat from the bike, only to discover that the wiring was a nightmare. Live wires ready to short against the frame; bare connectors and chocolate block. Wires of any colour, extension leads on the alternator output (they were also the wrong colours) wrapped in self-amalgamating tape. Several of the spade connector wires, just fell out when touched.
Anyway, a voltmeter across the rectifier output showed only a fraction of a volt. I tested the rectifier and found one of the four diodes open circuit and the four fins could rotate on the central bolt…it was scrap.
I had also checked the alternator output and there was only a fraction of a volt here too. There is a Lucas test procedure for checking the alternator…it will be the subject of another post. The diagram of the wiring for this bike is here. You can see the three connections to the alternator.
What a mess
Again, there is a test procedure for the two outputs on the alternator. I quickly discovered that one of the connections was open circuit, hence no charging! The primary chaincase outer cover would have to come off.
I went to drain the primary chaincase and found little more than two tablespoons of oil inside. All fourteen of the cover screws were not even finger tight. I removed them easily and then removed the outer cover…there was horrid black silicon sealant to peel off.
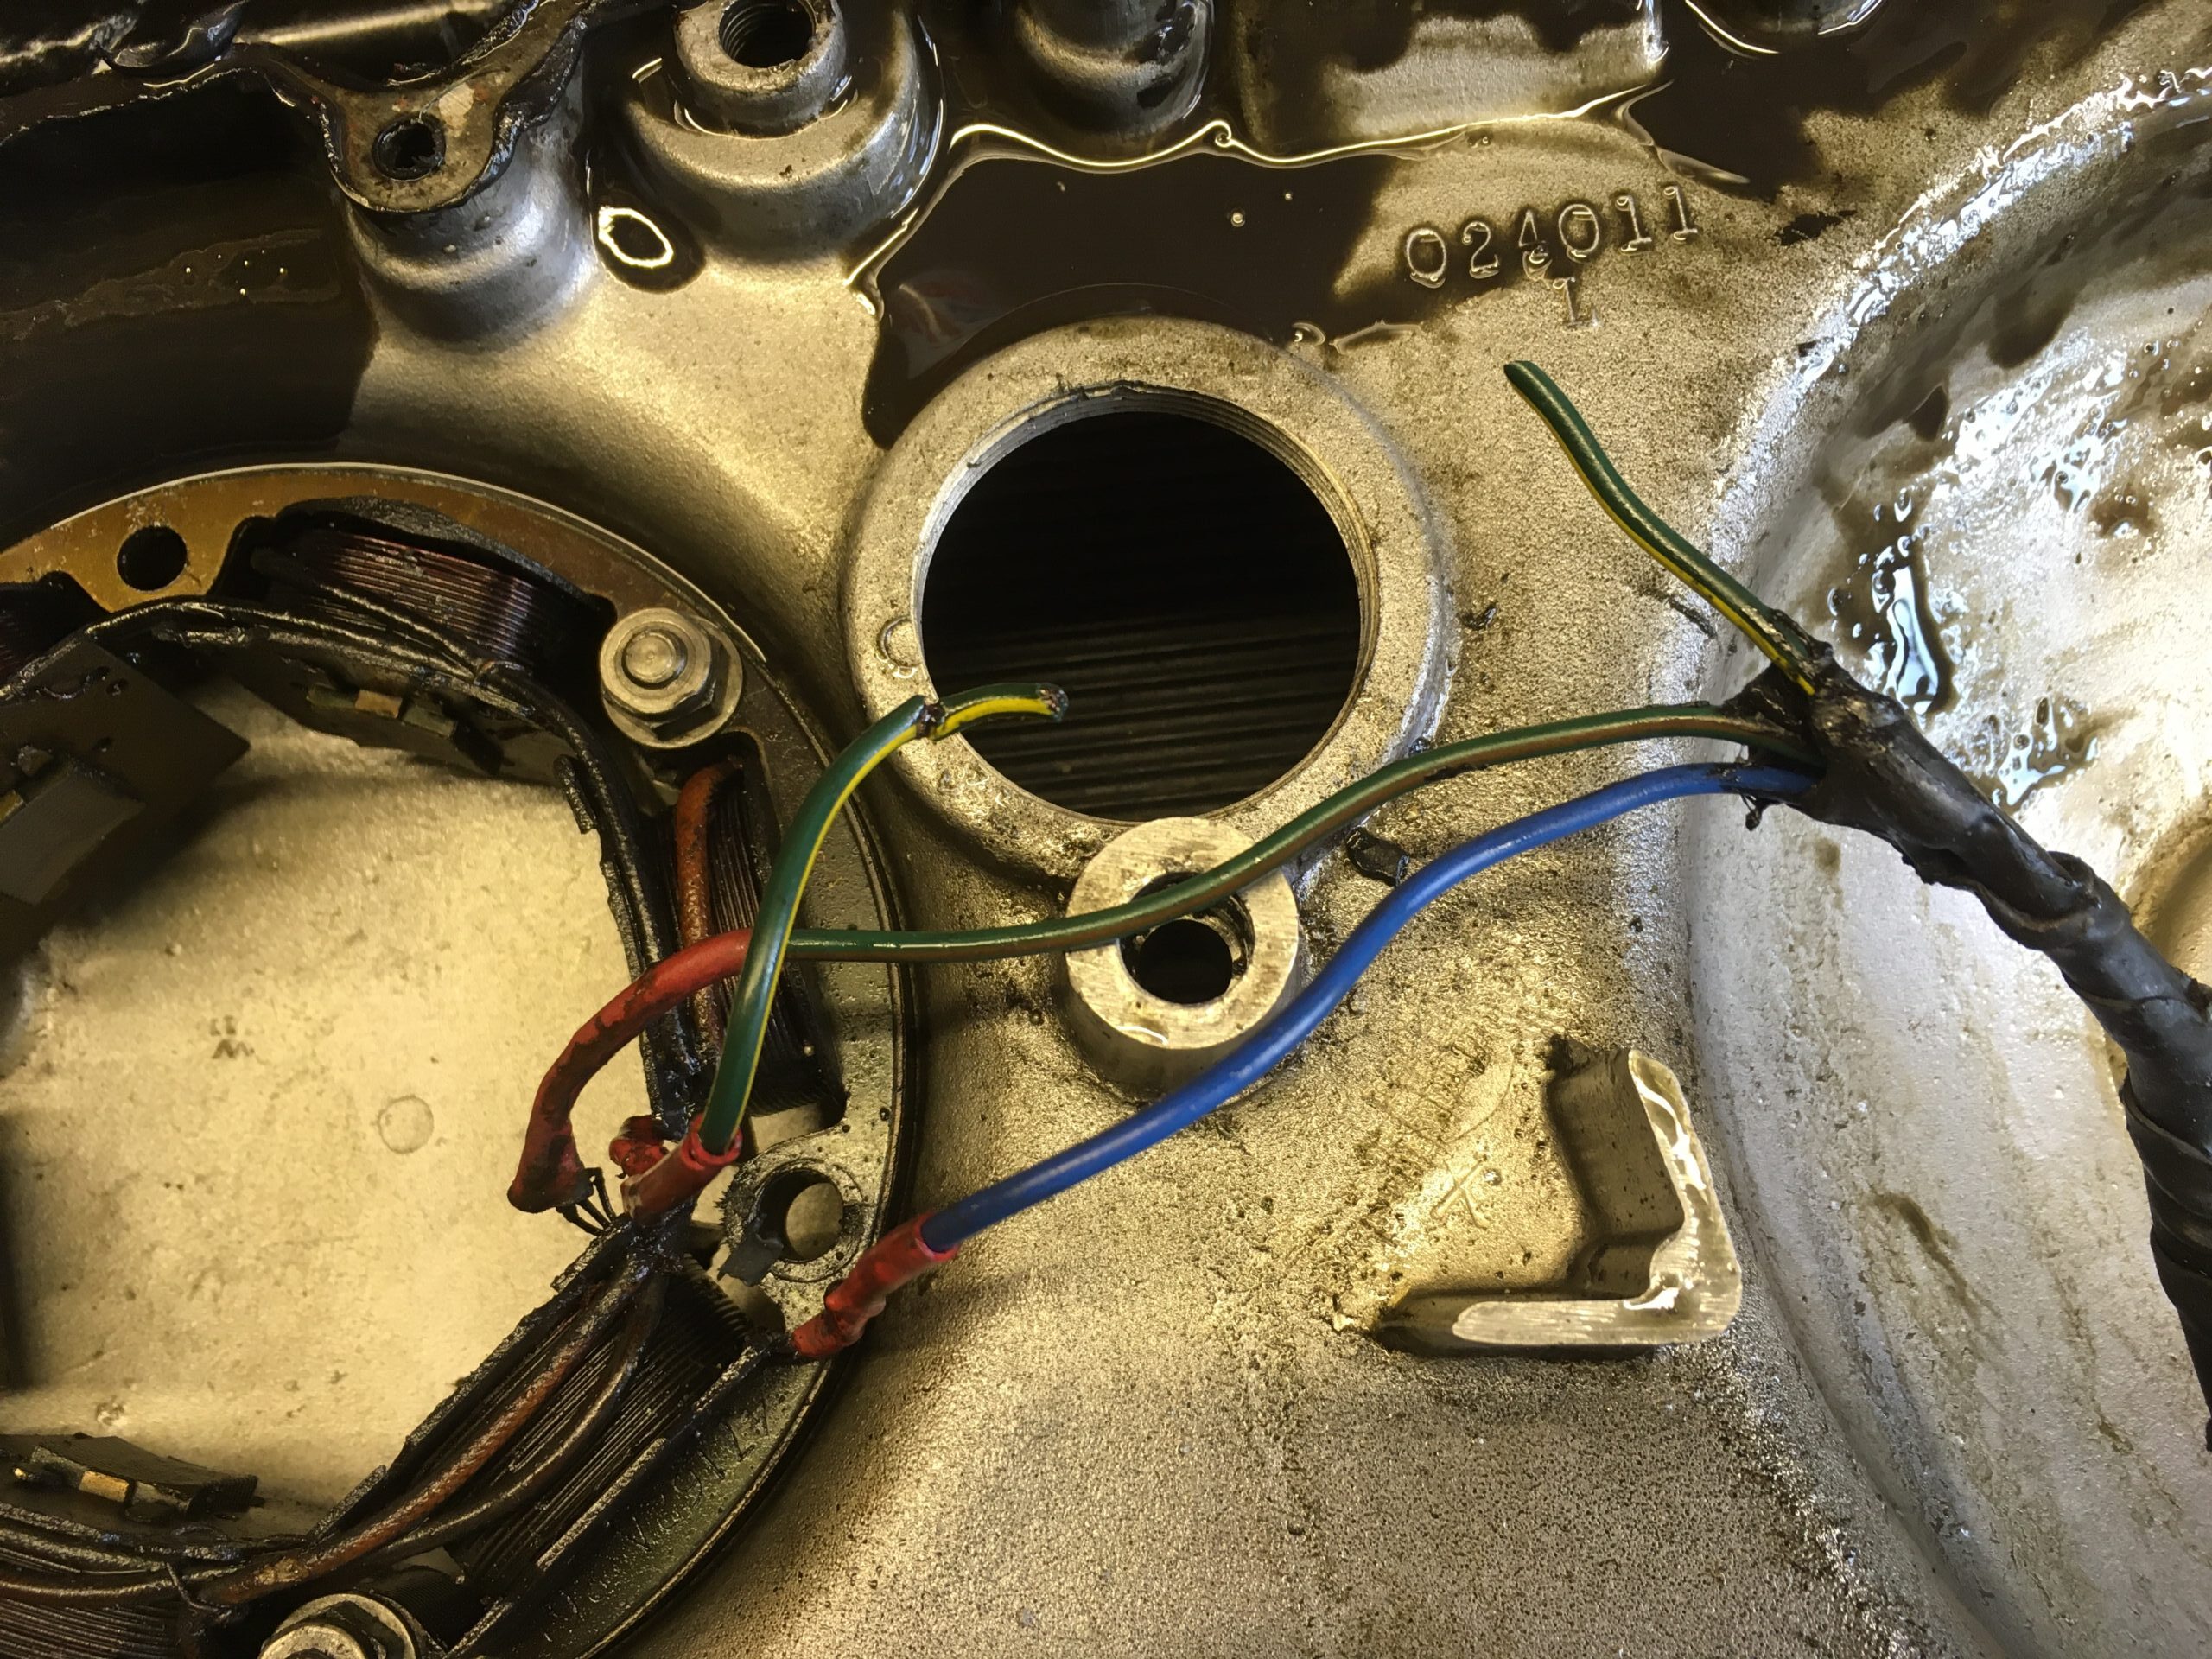
What I did find though, was a cut wire and none of them were the right colour…and more self-amalgamating tape. The stator was of the open frame variety, which is wrong for this bike…it should be a potted one. Anyway, it was in good physical condition, except for the three external connections, so it will remain for now.
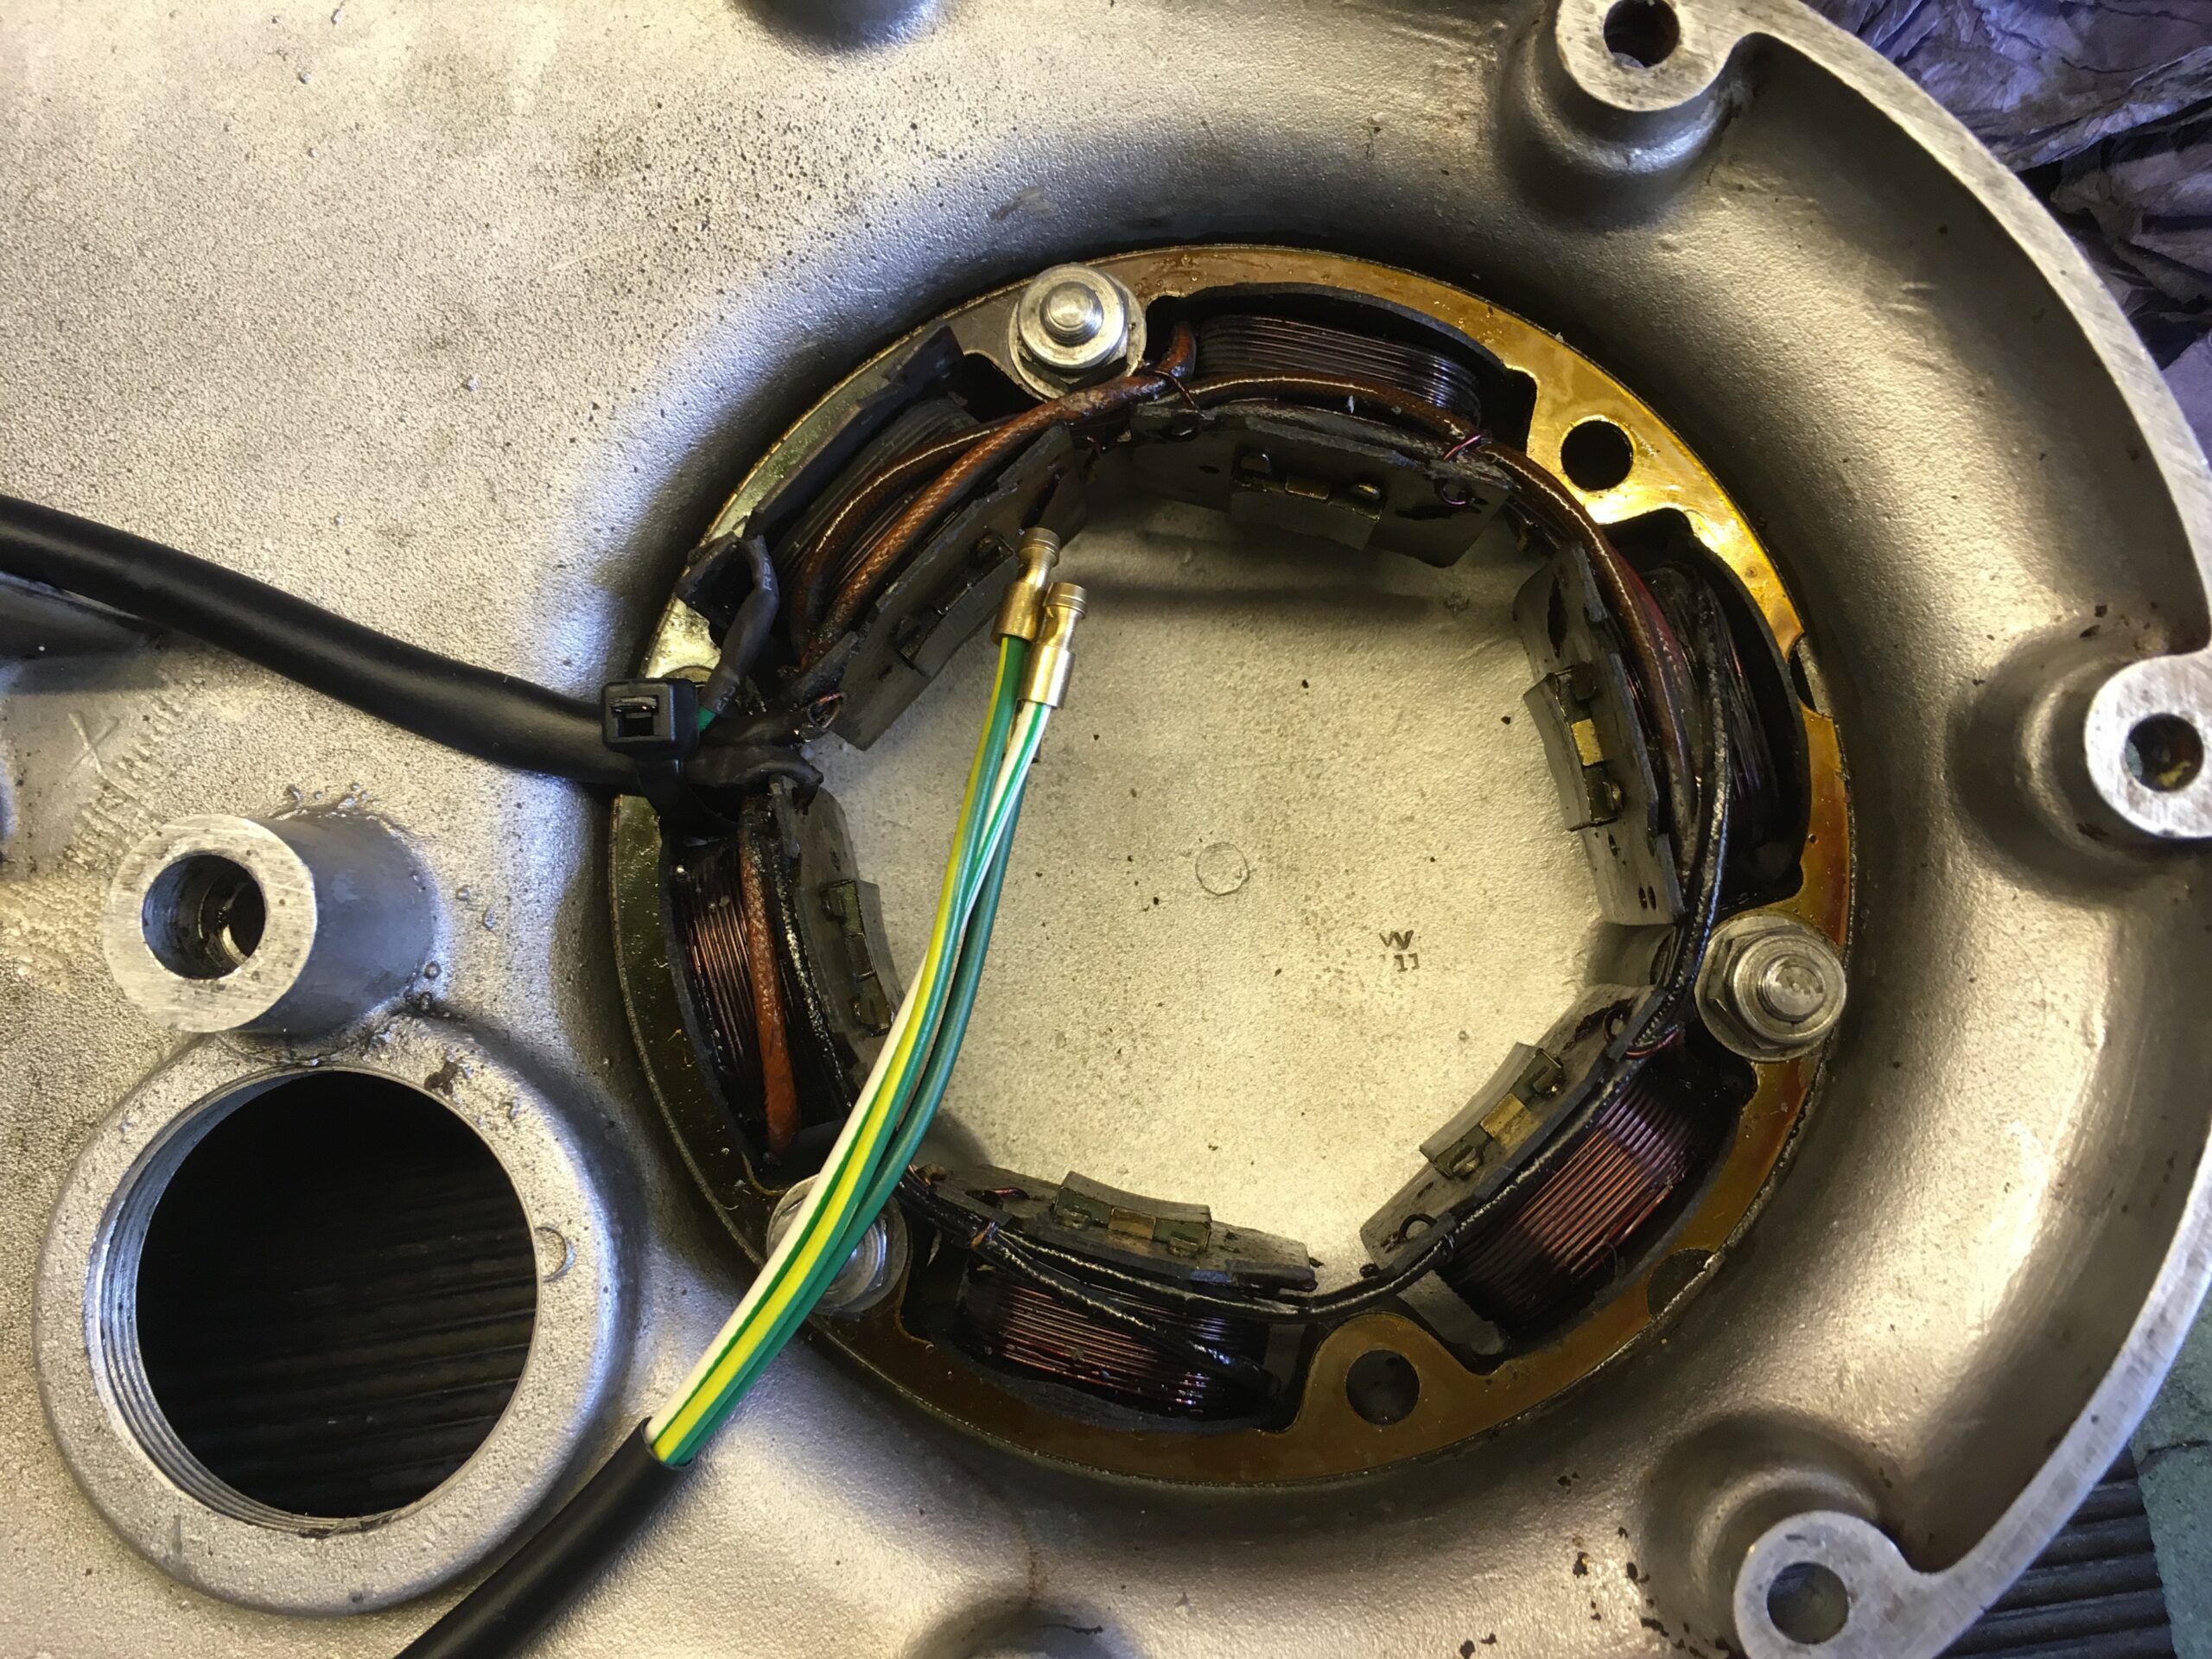
That’s better
I removed the old wires, and the long extension leads someone had fitted. Looking at the detailed diagram of the stator, there should be three insulated copper wires joined to one external wire, two to another and one to the final one. I noted that the three wire connection hadn’t been made properly when the last person had ‘repaired’ the stator. I made the connections properly, using the correct type and colour of wire, before cleaning out the chaincase and mating surfaces, replacing the missing cable grommet (part number 041065), fitting a new gasket (part number 024020) and reassembling the chaincase. I didn’t put any oil in so that I could dismantle it again if the dry test failed. I also ordered a couple of new inspection cap seals, part number 042025.
I noticed that the primary chain looked brand new, so I know that the seller had been in here relatively recently, to replace this chain. I’m guessing he had problems so never finished the job.
Correct chaincase oil level
I filled the chaincase with oil so that it was just touching the bottom of the chain. I noticed a slight leak a couple of days later, so the fourteen bolts may need nipping up.
So, after all the above, you would think that this really was the end of it all.
I went to the bike to try and start it, to check all the work that had been done…it was having none of it.
There was no spark…give me a break!
This bike has had the original Wader magneto replaced with a 2018 vintage, BTH PM1R magneto with separate HT coil.
The BTH Magneto conundrum
I couldn’t find any service information on the magneto, but contacted BTH Components Ltd who were very helpful. They supplied me with an upgraded version of the HT coil, which I hope will solve the problem. The coil needs 6v across it to generate a spark when the magnetic field collapses.
Right now, this is where I’m at…before adding links to websites too.