There is plenty of information on the internet regarding the rebuild of Norton Roadholder forks, so I’m not going to reinvent the process again here. One of the best step by step guides, in my opinion at any rate, is the one by Motorcycle Classics; you can find it here. There are other articles in the Jampot Archives repository.
The 1966 Matchless G12 uses the LONG Norton Roadholder forks with a round cross section, rather than the slightly oval one found on the 1970s Norton Commandos; although you can use the later fork sliders. They are a little stronger, especially in the area of the pinch bolt, which many people over-tighten at the wrong time.
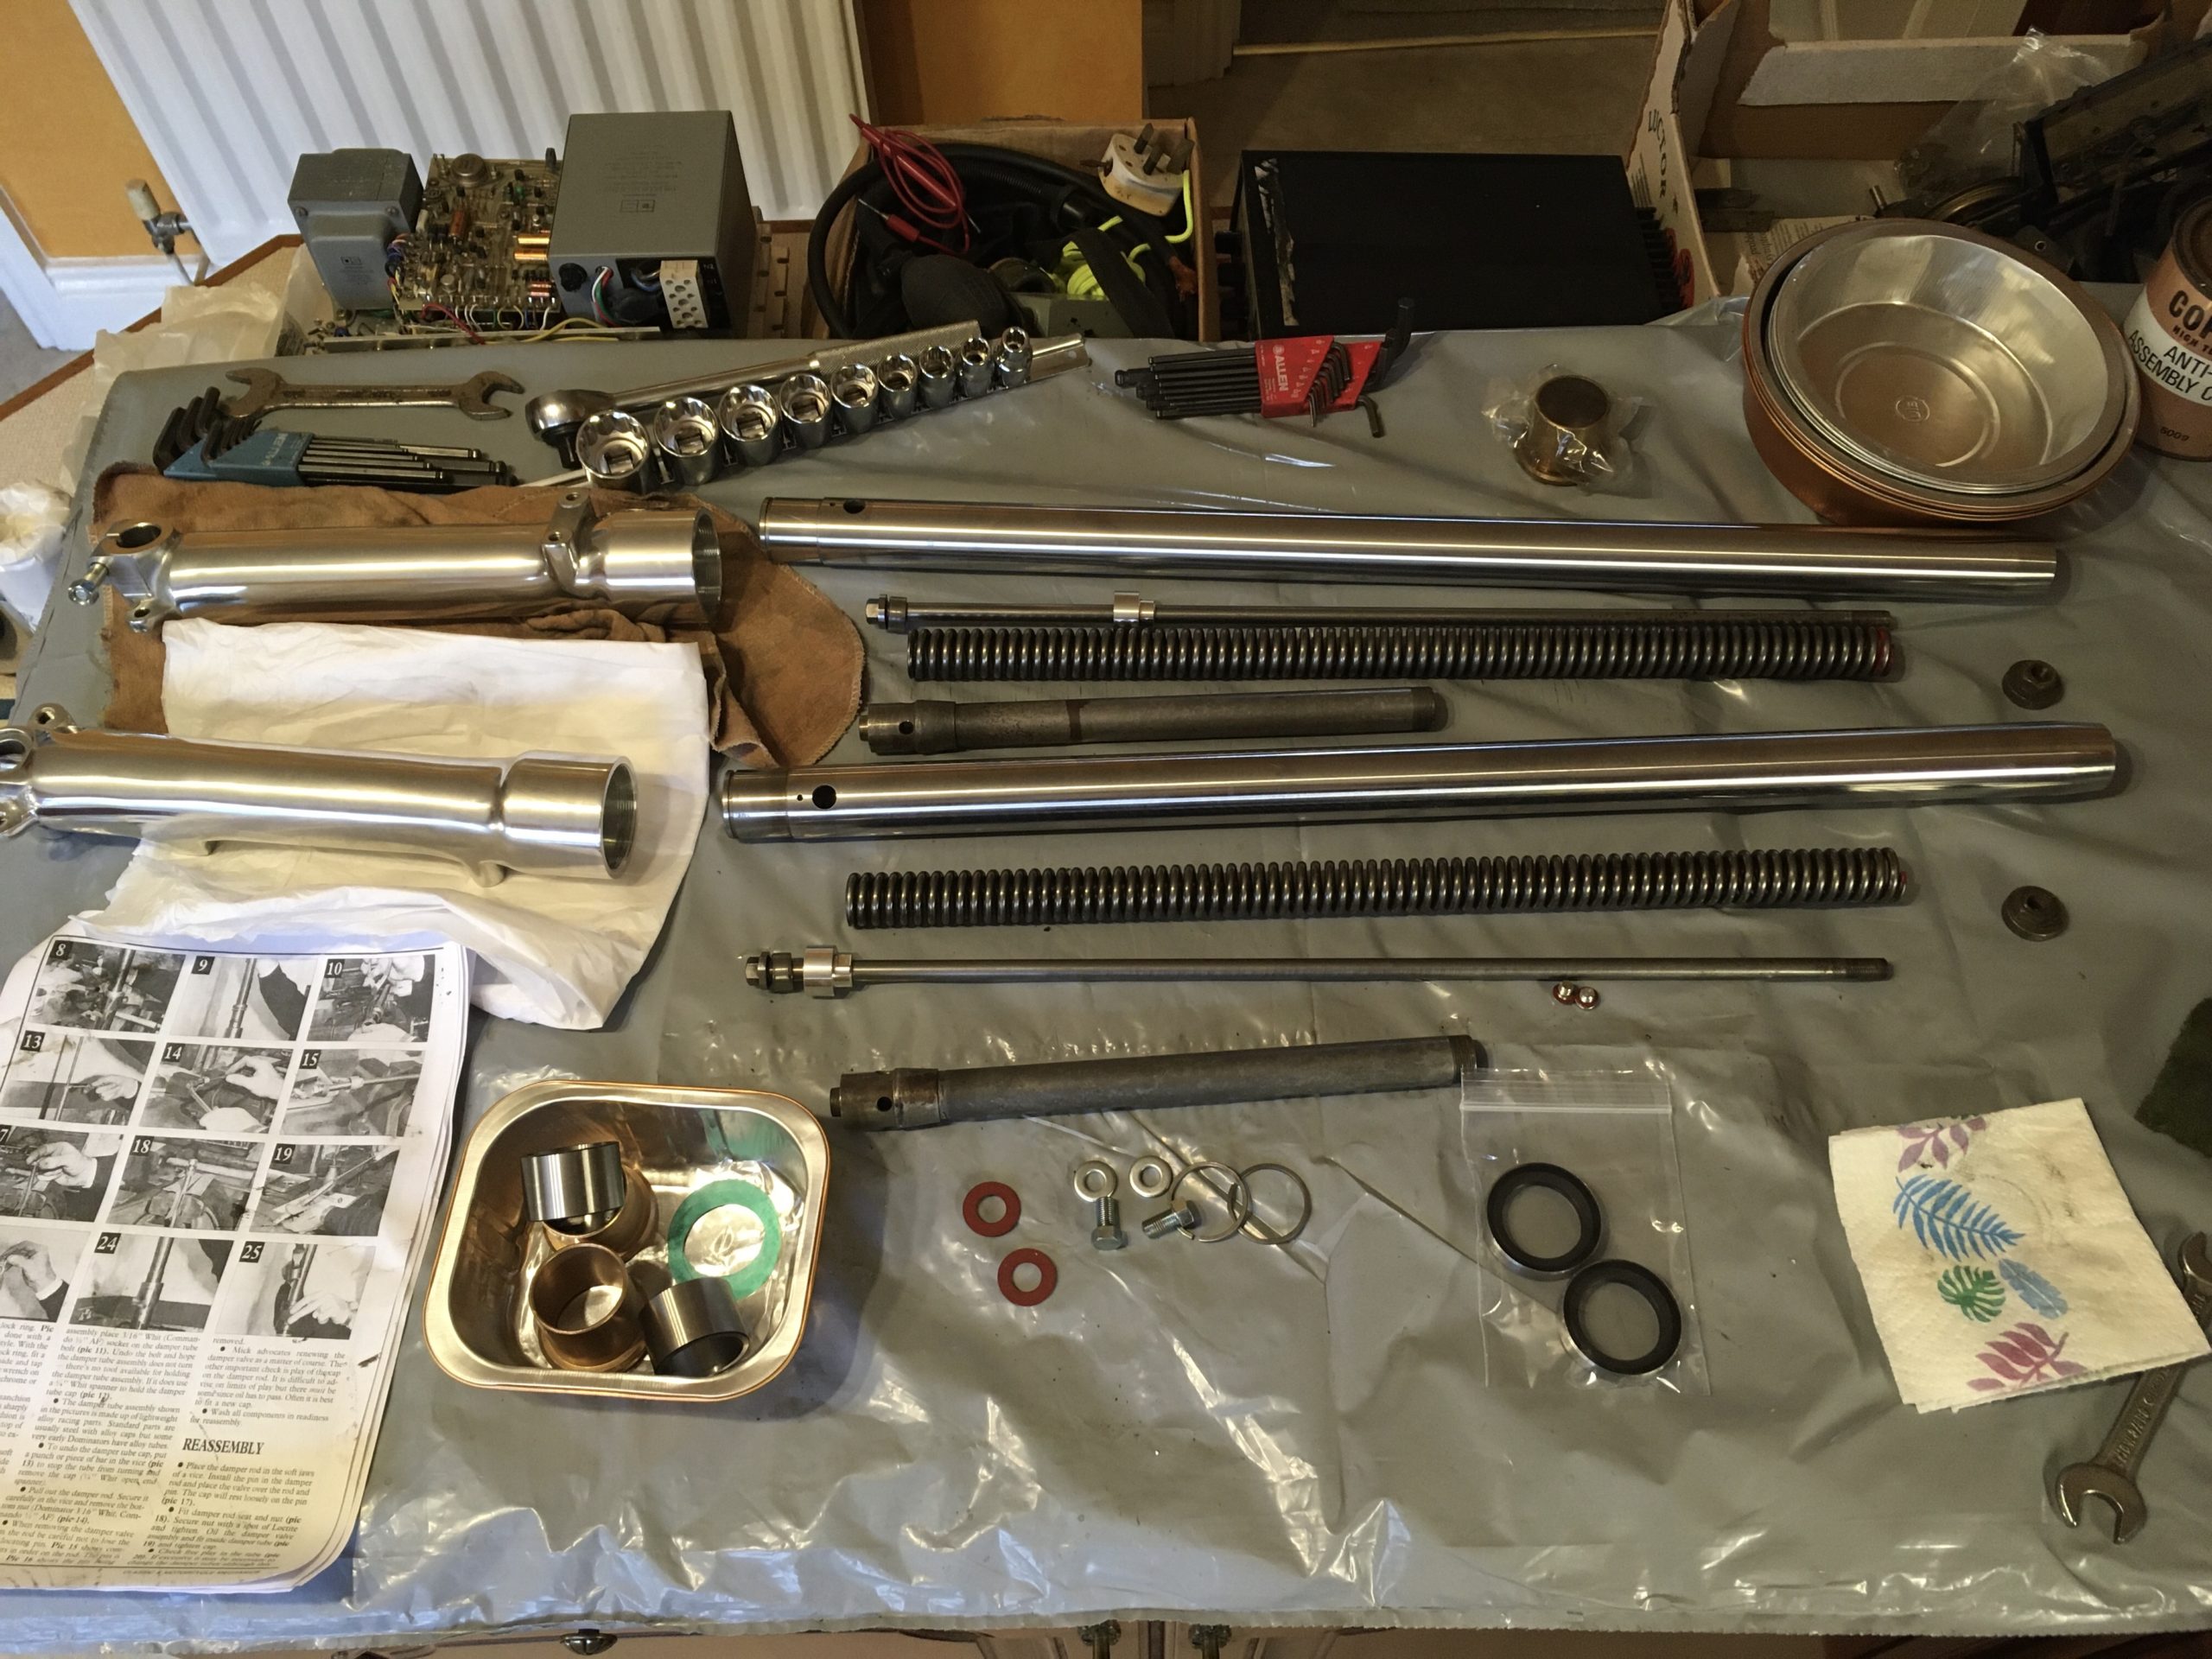
Parts laid out in the kitchen, ready for reassembly
I don’t wish to have to strip the forks again in a hurry, so I replaced some items that might have been serviceable. The nearside slider had a cracked pinch bolt clamp and a few other cosmetic issues so I replaced it…it looked so much better than the offside one, that I replaced that too; especially once I found it was the later oval section variety.
I had already bought a complete bush and seal kit, along with new aluminium damper rod caps, damper fixing screws and washers, drain screws and washers plus mudguard and pinch bolt fixing components.
The forks were removed from the bike using the method in the Motorcycle Mechanics guide then all the parts were carefully cleaned. Pay particular attention to where the gunge accumulates: at the bottom of the fork sliders and at the bottom of the damper tubes. I used pipe cleaners and brake and clutch cleaner to get the gunge out of my tubes. I found the damper valve assemblies in excellent condition so they were reused, as were the rest of the damper rod assemblies, except the aluminium caps. When I checked the bottom end of the damper rod tubes, I noticed a few raised bits on edges of the fibre washer seats. They had been caused by knocks received either when the forks were being assembled in the factory, or by a previous mechanic. I used a fine stone to remove the high spots, just to be sure the tubes would stand straight in the sliders.
When I examined the fork stanchions closely, I did find evidence of wear and a small amount of pitting where the forks had been resting for many years, complete with a little moisture; the stanchions were therefore replaced. Both slider extenders were quite badly corroded, and as they are not too expensive to buy, they were replaced too.
Red paint for solo motorcycles
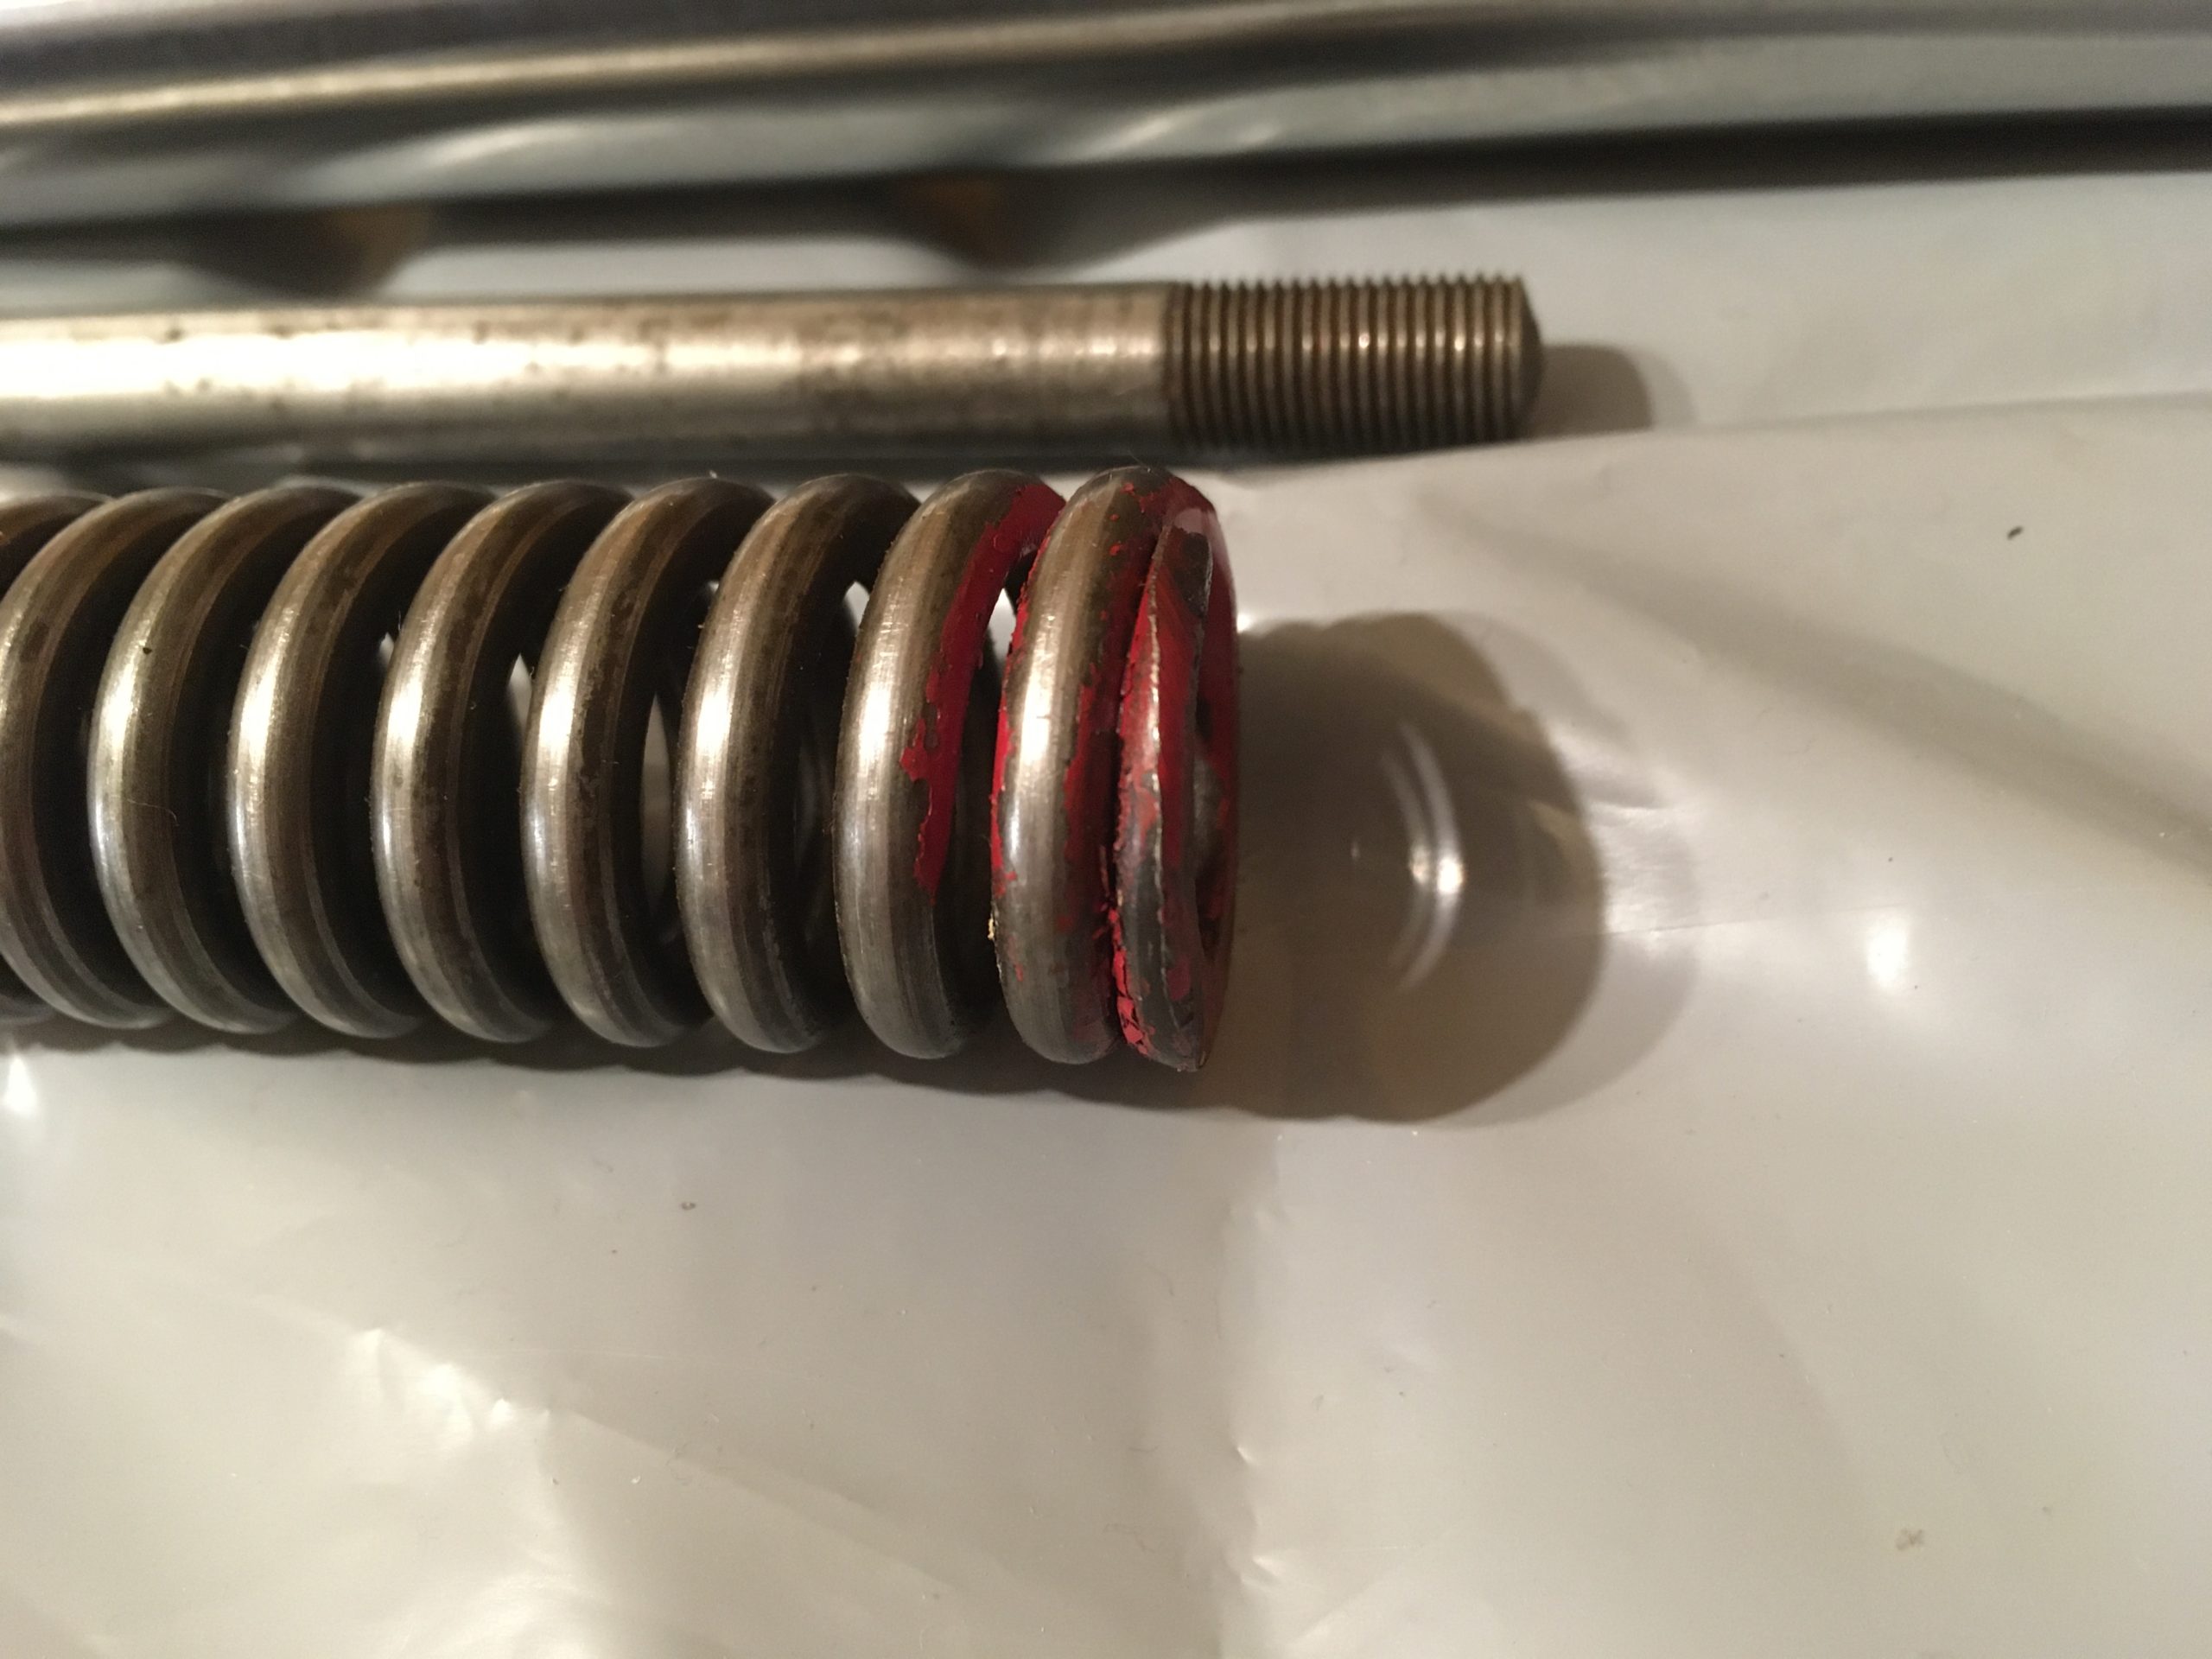
Once you have your forks apart, check the length of the two springs; the official length is 18.687 inches. Whilst you’re doing that, take a look at the colour of the paint dabbed on the top end of the spring; red is for solo motorcycles and green is for sidecar versions.
The forks were carefully reassembled, according to the Motorcycle Mechanics guide, all parts being smeared with fork oil. I used Lucas 20 WT synthetic fork oil, but you can use any good brand such as Silkolene or Castrol.
I used a universal fork puller kit bought online as no one locally had a set; make sure you buy one that includes the Norton Roadholder adapter as not all of them do; the size you need is 1 and 3/16″ x 20tpi. I’ve put up a separate page about the oil seals as there are different ones available.
Once you’ve pulled the fork assemblies into the yolks, you will need to very slowly add 5 fluid ounces (142 ml) of fork oil. The round top on the damper rod which retains the main spring, makes quite a good seal around its edge. You will need to slowly add oil with the round part about half an inch below the top of the yolk, or add it slowly using a thin pipe and funnel between the coils of the spring with the top of the damper rod an inch or two above the top of the yolk.
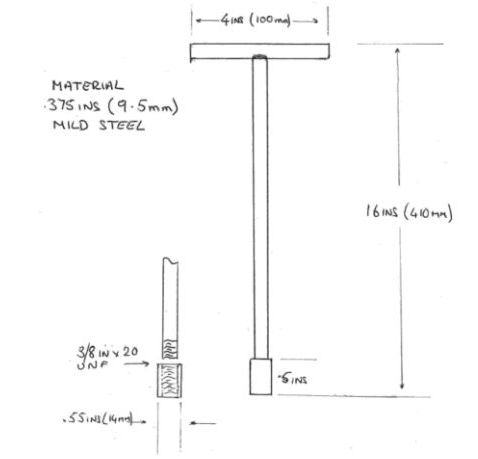
Damper Rod Retrieval Tool
If you make a damper rod retrieval tool, you can pour the oil in much faster as the round top won’t be present. Once topped up, retrieve the damper rod and attach the top to retain the spring. Once done, attach the two top caps and screw them into the top yolk. At this stage, don’t tighten them fully and don’t tighten the yolk pinch bolts.
The next thing I do is to fit the front wheel and make the spindle nut finger tight.
With the bike on the ground, push fully down on the forks, with the brake on, then allow them to come back up. Do it a few times to centre everything.
Tighten the tops of the forks so they are nice and tight with a socket spanner…the books suggest 35 ft/lb. Tighten the wheel spindle using a suitable socket spanner and a tommy bar to keep the other end from turning. The books suggest 60 ft/lb, but personally I make mine dead tight using a spanner I may need to use to undo it by the side of the road; you’ll be checking your nuts and bolts are tight enough regularly won’t you 😉
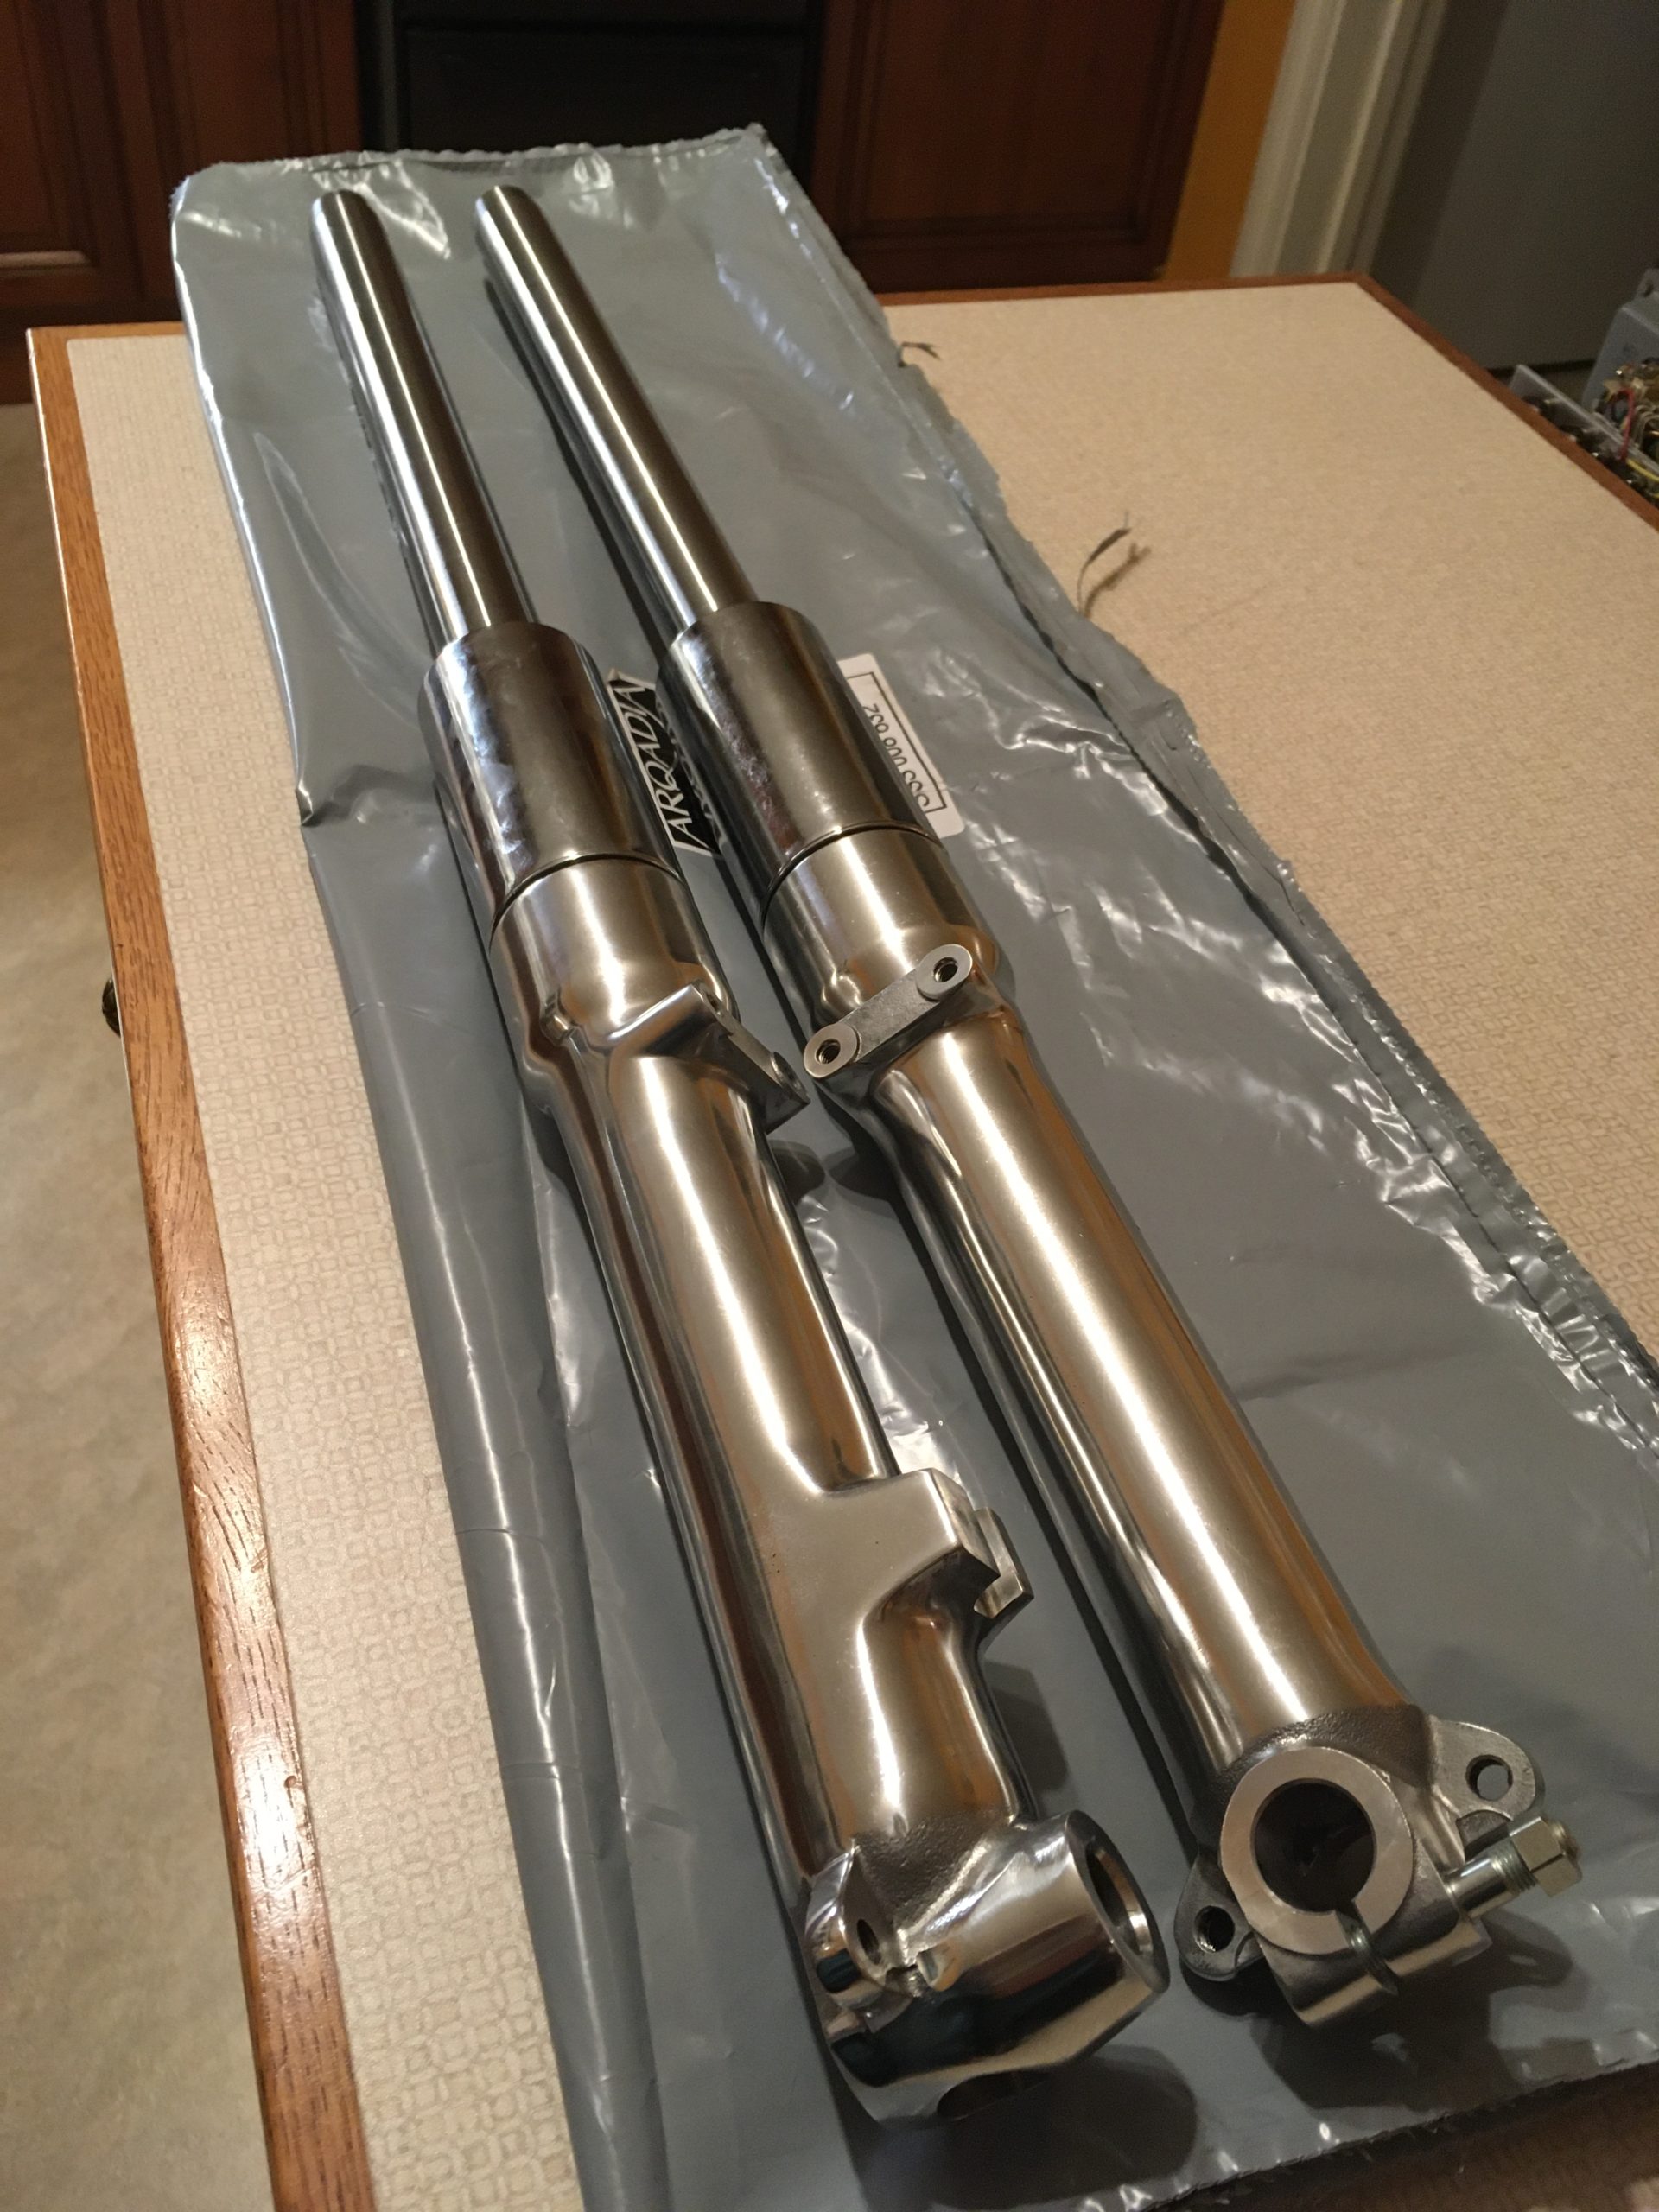
Ready to refit
Now, tighten the pinch bolt not on the left side of the forks. It only needs to be spanner tight to about 10 or 15 ft/lb. All it’s for is to stop the spindle rotating in the fork slider. Overtightening this nut leads to cracked and broken pinch bolt clamps; the previous owner had snapped mine if you’ve been following my pages. I used an extra plain washer and split washer on the nut too.
Next you can tighten the two bottom yolk pinch nuts, again they only need 10 to 15 ft/lb.
There are a couple of pages related to this, one on rebuilding the hubs and the other regarding the oil seals used in the forks.